How to Build a Fire Pit With Pavers

Built in paver fire pits are a great landscape ideas to your backyard.
They make a great focal point for backyard entertainment. They are long lasting, and durable and you can customize the size to fit your backyard needs.
In this article, we’ll talk about different paver fire pit kits and show you how easy they are to build.
Table of Contents
Type of blocks used in Fire Pits
Fire pits made out of different landscape blocks have a built-in look that are very durable, weather resistant and last a long time.
The type of blocks used for fire pits can be used in various ways in the backyard. Some are used for retaining walls, landscape edging, raised bed gardens and walkways.
As an Amazon Associate I earn from qualifying purchases.
Some blocks have a trapezoid shape that allows them to be installed in a circular or wavy shape, which is great for circular fire pits. Some blocks have a rectangle or square shape which work well for square fire kits.
If you don’t want to figure out how many blocks you need for the design you want, fire pit kits are great, since everything you need is included.
In my kit, the blocks and fire pit ring insert was included and the only thing I needed was the construction glue to add between the layers to secure the blocks together.
Prepping your Site
Once you have your fire pit kit picked out, you’re ready to prep your site.
You need to install your fire pit on level ground. You can buy paver leveling sand if your area is very unlevel, making it easy to level your pavers quickly.
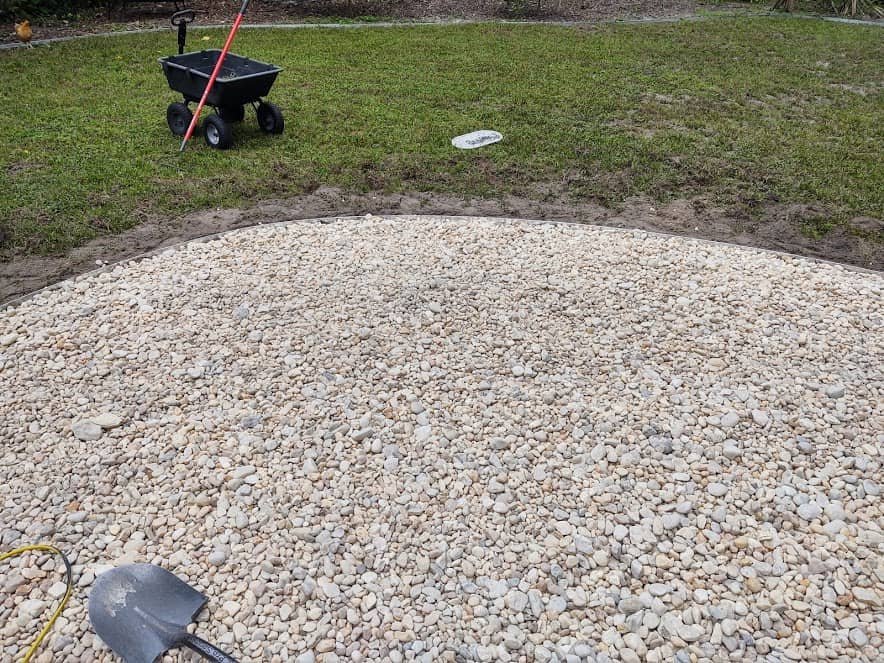
In our case, I had already leveled the sand in preparation for the river rock I spread out so I was confident I could level the ground without the paver base sand.
I had a half circle as the defined area for the fire pit and wanted the fire pit kit right in the middle of the half circle.
I took some measurements side to side and front to back to determine the middle.
Once the middle was found, I laid out the fire pit insert inside the center measurements to determine my outer circle to place the blocks.
I had to remove river rock around the outside of the insert making sure I didn’t accidentally hit the insert.
I used a shovel to move the rocks back about 8-10 inches to have room for the paver blocks.

Once I removed all the rocks from the outside perimeter, I removed the insert and then removed all the rocks from the inside circle.
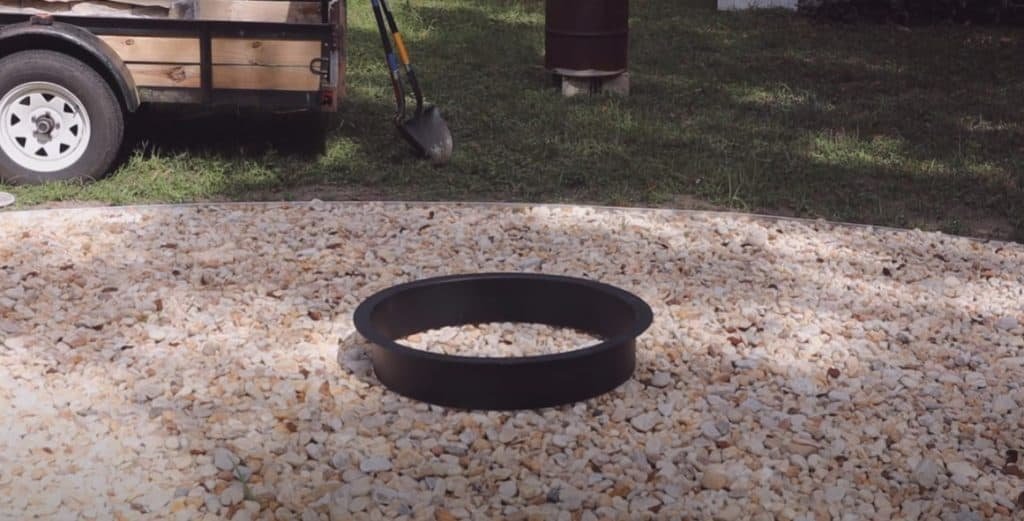
Once all the rock was removed in the area, I placed the insert back in the center of the area and made an impression in the sand with the insert.
Now that I have my ring outlined in the sand, I’m ready to begin inserting my blocks in a circle.
Installing the paver blocks

The picture above shows how the paver fire pit kit was packaged from Lowes on a pallet.
It’s pretty heavy and you will need a truck bed or a small trailer to get it home.
They moved it on the trailer with a forklift so be prepared if you’re ordering one from the big box stores.
Look over your paver blocks to see if any are chipped or cracked.
I found several that had small chips on the outer edges. This happens when pavers are transported from place to place and is common.
I could pick all the rocks with some imperfections for my bottom level.
I knew the imperfections would be covered by the river rock on the bottom level. You may need to place the rocks on a side that you may not see or is not as visible.
Once the rocks have been looked through, you’re now ready to place them around the outlined circle. I alternated placing them right and left of the original block.
Having the circle outlined in the sand helped keeping the blocks in a tight fit including the last block which fit perfectly.
I chose to fit the entire bottom layer of blocks before doing a final leveling. If your dirt is fairly soft, sometimes you can take a mallet to tap the block down if it’s higher than the adjacent blocks.
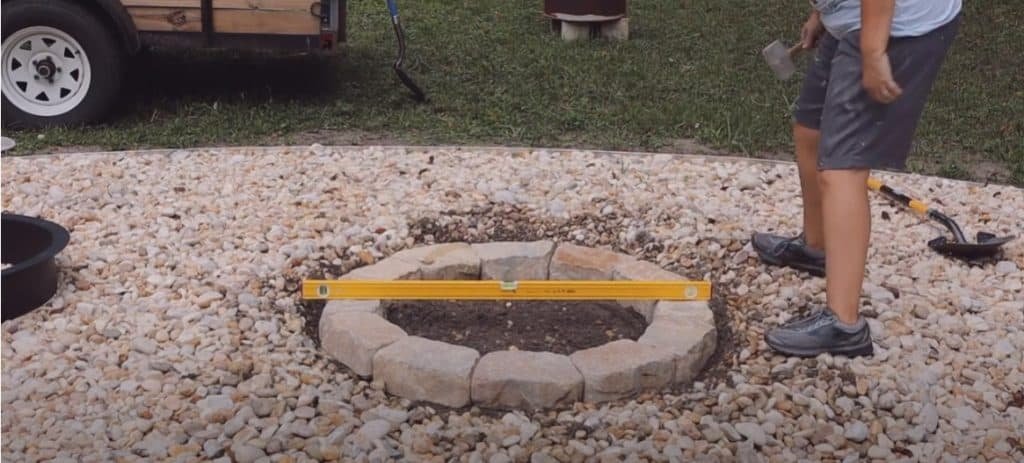
I laid a 4 ft level across the bottom layer in different positions to see how level I was all around. I only had to raise or lower a couple of blocks to get everything level.

I started with the second level of blocks placed so that it was halfway between two lower level blocks, as shown with the red line in the pic above.
Alternating each level of blocks makes it stronger than lining all levels up with the same joint line.

Once I finished the second laver, I placed the fire insert over the blocks to gauge how level everything was, one last time.
Since the blocks have some minor variations, I discovered that a couple of blocks on the backside were low since the insert wasn’t touching the second layer of blocks.
I added some dirt on the bottom layer of blocks and that raised the second layer to right under the insert.
Gluing the Blocks Together

Now knowing everything was completely level all the way around, I was ready to use the construction glue between the first and second layer of blocks.
The construction glue is inserted on the blocks through a caulking gun. If you have little experience with caulking guns, be careful with air bubbles in the glue.
When you pierce the glue tube seal and begin to squeeze it out the caulking gun, sometimes there will be an air bubble that keeps the glue coming out of the tube even if you’re not still squeezing the caulk trigger.
Release the caulk gun trigger each time, which will slow the glue from coming out.
Once the air bubble passes from the tube, the glue will no longer continue to run.
I took off one block at a time on the second level and put the glue in a circle on the first level of blocks.
I repeated this for all blocks on the second level tapping each one with a mallet to spread the glue out.
I completed the third level of blocks in the same manner as the second level. Installing the entire level of blocks first, then removing each block individually to install the glue between the two levels.
Now you’re ready to place your metal fire insert over the top of your last layer of blocks.
With the insert in place, I tapped all the blocks outside of the third level to ensure they were installed tight against the insert.
With a final inspection, I made sure all blocks were tight against each other, and the insert before the glue was set.
I didn’t touch anything else for 24 hours to let the glue set.
We received some rain during that time so I checked if the glue was set by trying to pick up one of the blocks and it didn’t budge.
I think glue is key to keeping everything together rather than just loosely laying the blocks.
Conclusion
If you want your blocks to last longer, you can line fire bricks around the bottom of your fire pit where the paver blocks are exposed to high heat. You could also install lava rock on the bottom as well.
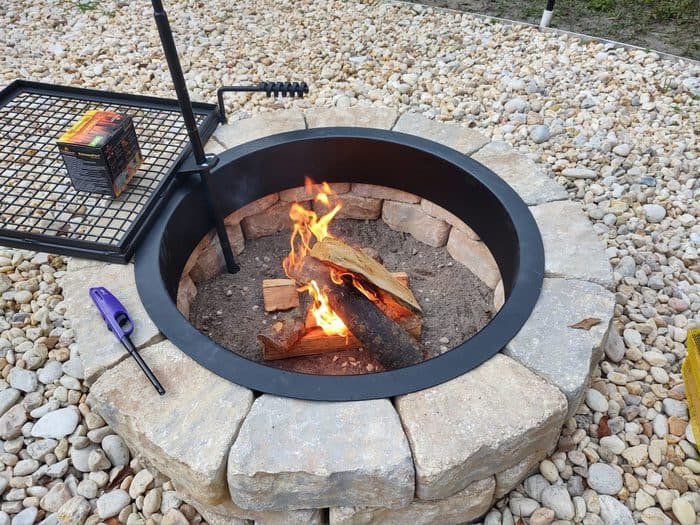
Stand back and admire you’re new built in fire pit. In all, it took about an hour once I started placing the first block. My site prep took about another half hour which will be the biggest variance with installing your own fire pit kit.
In the picture below, we added the Titan adjustable swivel grill to our fire pit as we were about to roast some oysters over the fire.