16 Inspirational Backyard Landscaping Ideas to Get Lost In
Are you looking for inspirational backyard landscaping ideas? I’ll share a few backyard designs we’ve come up with over the years to turn your boring backyard into something worth hanging out in.
Most of this round up is from projects that we completed in our different backyards over the years. Unlike most roundups, we took these photos and built many of these items. I hope you enjoy these backyard landscaping ideas that I’m sharing with you.
Cozy Deck
We’ve always had a deck in our backyard. Whether we bought a house which already had one or we built brand new, it’s always one of the first projects we plan so we can spend more time outdoors. Having a deck defines our outdoor space and it seems easier than laying pavers. Plus with a deck, you can have one or more levels. Decking is just one of our most favorite backyard ideas.
And don’t worry, if you have a tree or stone too close to where you want to build your deck, or even a grill deck, you can always build around it. The final touch is scribing the area where the stone or tree is and it give a very built in look.
Here are a couple of different decks we’ve done over the years with a stone or tree in the way. You can even add an extra deck level if you have the room.

Here’s a look during the construction process for building a ground level deck around a rock. The extra framing around the rock will support the deck boards.

And here’s the final look of the deck with the rock scribed out. It’s really a great look. I like this one better, just because decks around trees can be a little more complicated since the tree could still grow and change.
As an Amazon Associate I earn from qualifying purchases.

She Shed
This is on my bucket list. Working from home is great, except when it isn’t. We hope to tackle this task next year so I can have an office that I can go to get work done in peace and quiet. Here are some wonderfully inspiring she shed design ideas for any backyard escape.
Backyard Garden
We’ve done a little planting this year. It’s not our most favorite thing to do, just because we don’t feel like we’re very good at keeping things alive.
Although I was able to grow sugarcane from one stalk that a friend gave to me. It felt more like a science project for the first four months. I still have one stalk growing. The other 2 blew over during remnants of a hurricane.
We started the backyard garden below this spring. I’d like to say it was a success, but we found out that it wasn’t getting enough sun to produce the vegetables, though we had a lot of greenery. We’ll try again this fall.
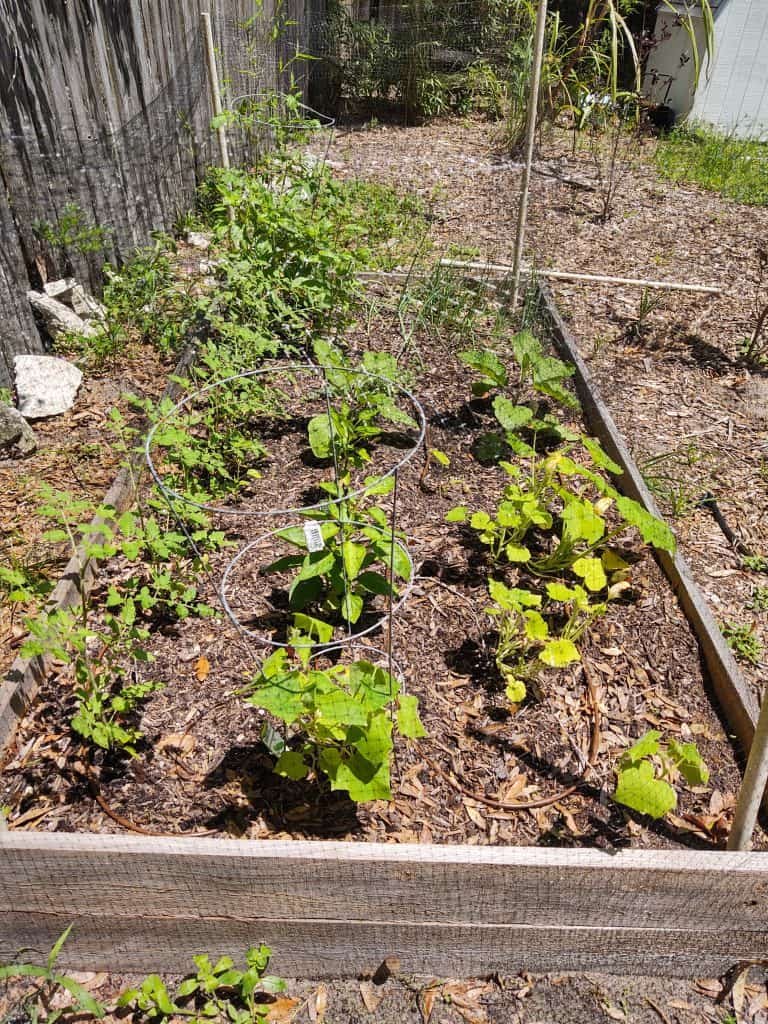
We go for easy and sometimes cheap landscaping ideas, so doing things like planters and keeping the garden area small helps us manage the gardens. You can choose to go big or small, depending on your backyard space.
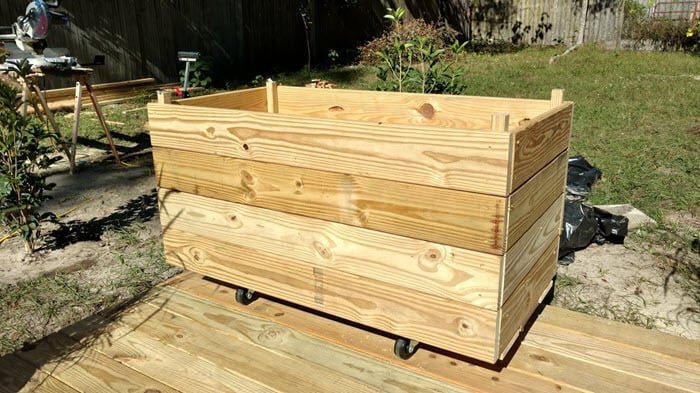
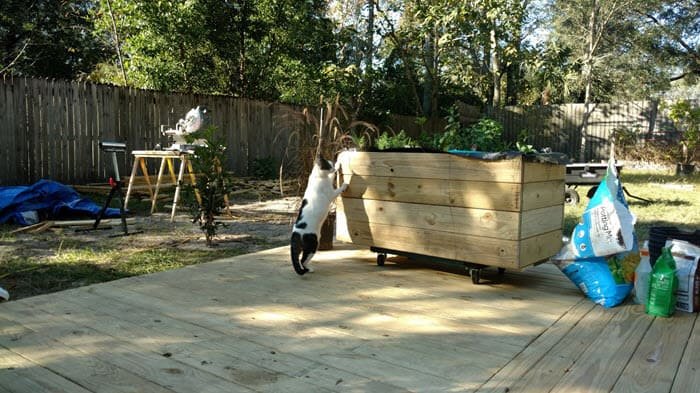
Here, we created a raised planter for our large deck which we started with herbs and strawberries.
If you prefer, you can create an area just for your garden with a fence and gate. It won’t keep all critters out of it, but it will definitely help.
Backyard Bistro
Sometimes you just want somewhere to sit and read your morning paper and sip your coffee. I love the idea of a little quaint sitting area in the backyard where the sun comes through softly from the branches. This way it’s not too hot, but a lovely outdoor experience.
These areas are also perfect for the small backyard design ideas. This can also be great for evening dinners with your loved ones.
Fire Pit
Fire pit areas don’t have to be extravagant to work. We started out with a very cheap and easy to put together fire pit for our backyard. We wanted to have an oyster roast one weekend and threw it together with the cinder blocks we already had in our backyard.
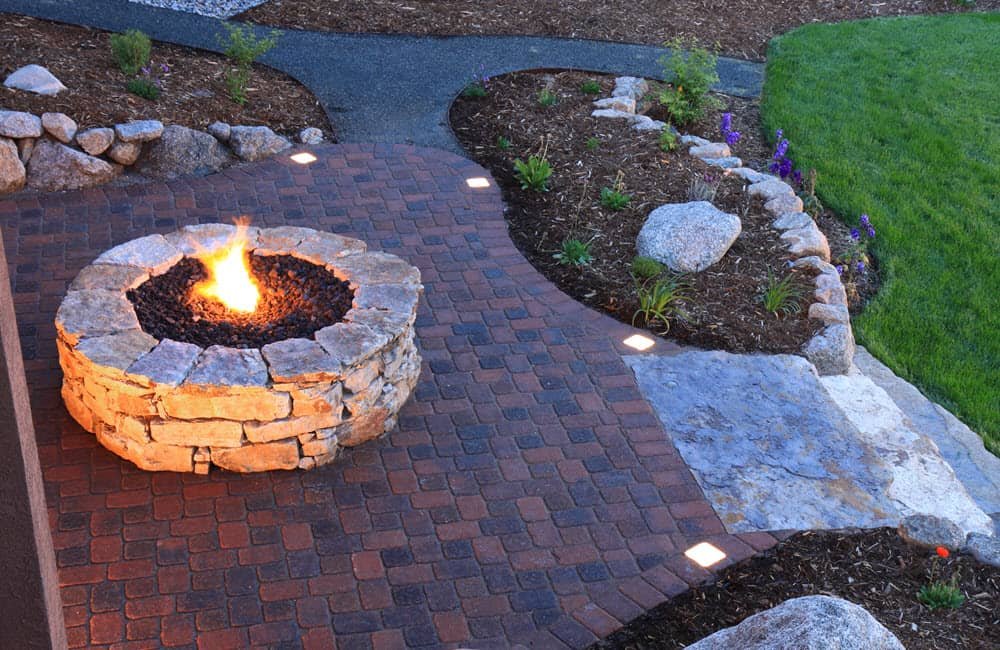
We’ve since created a more built in fire pit area with river rock. But just start small and work your way up.
You can definitely dress this up or down, depending on what you’re going for. Really, it’s about being able to make a fire and sit around with friends and family while keeping the fire going anyway.

Plunge Pool
Sometimes you just want something easy to get into after a long day, but you don’t want something huge in your backyard. Plunge pools are making a splash (ha) these days. They are pretty simple to setup. Since most are less than 2 feet, you don’t need to worry about permits or city ordinances.
This is our best friends’ backyard. They wanted a plunge pool. This one was put together with most of the items bought at Rural King. In fact, our best friends went to find the plunge pool and the Rural King employee made the hole and gathered all the things they needed to make the plunge pool work. He even worked out the right pump they needed for it.
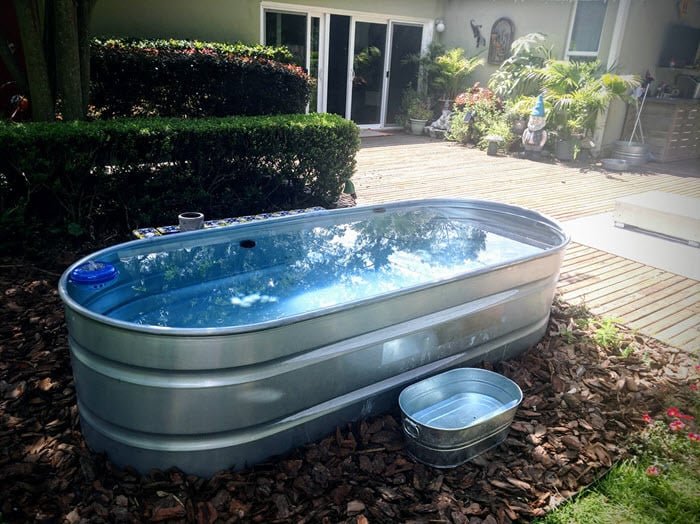
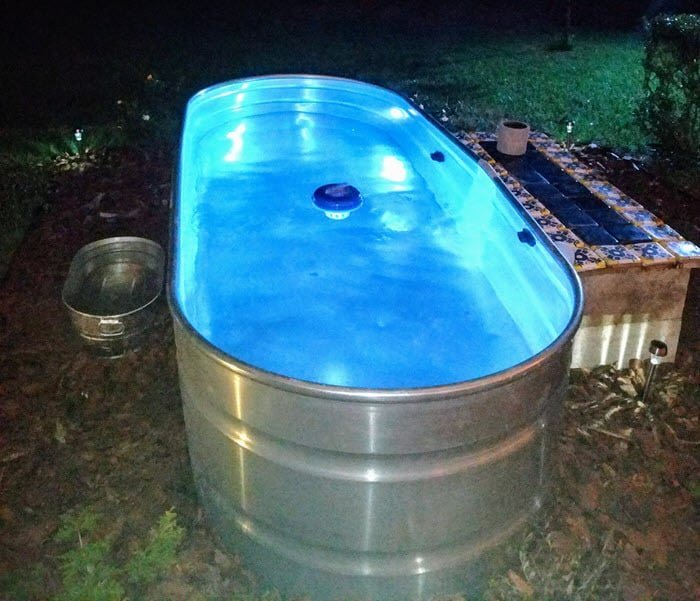
And this is what it looks like at night. They added some lights in and around the pool. They also have little pillows to rest their heads on the side. It’s very nice in the summer nights.
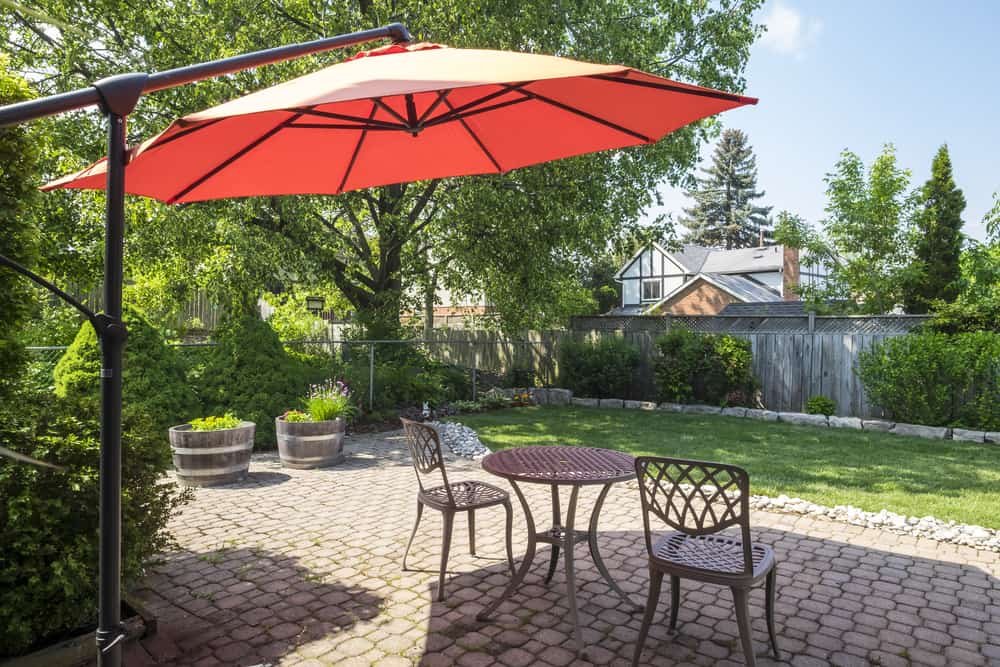
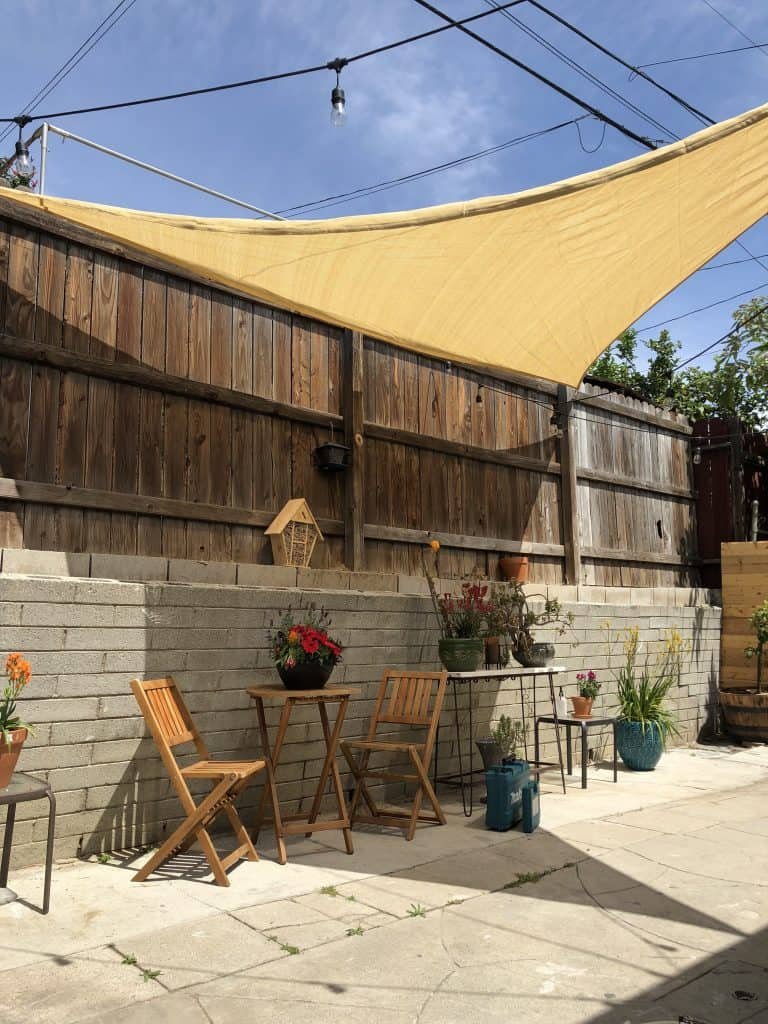
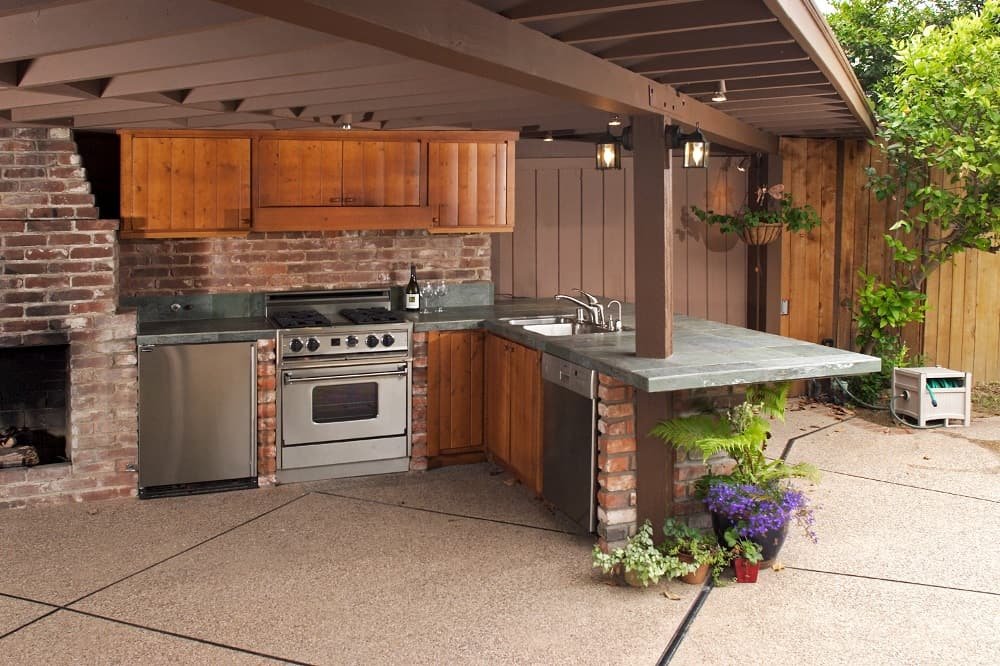
Shaded Patio
There’s always an ongoing search to find the perfect area in the backyard to enjoy being outside, but where you can also go to shade yourself during the warmer months.
Here are some shaded patio ideas to help you come up with the perfect shaded backyard landscape area. We helped our best friends with their outdoor kitchen area and we made the concrete counter tops. It’s beautiful and we loved how they turned out.
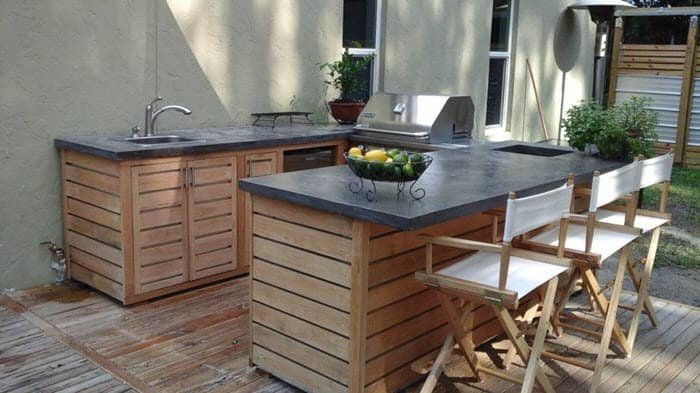
The problem?
The concrete got super hot in the summer. So we added a cover over the area. It’s great for all kinds of weather now. We were just hanging out last weekend during a light rain even.

Admittedly, that’s a lot more work. Here are a few other shaded patio ideas that might not be as difficult. Shade sails can work for you, but you won’t be able to enjoy your area if it’s raining.
Pergola
This is one of our first backyard designs that we did and it was for Jena’s mom for mother’s day. It was a fun project to get through and took the weekend to finish. The biggest thing was leveling the ground area to put the pavers down.

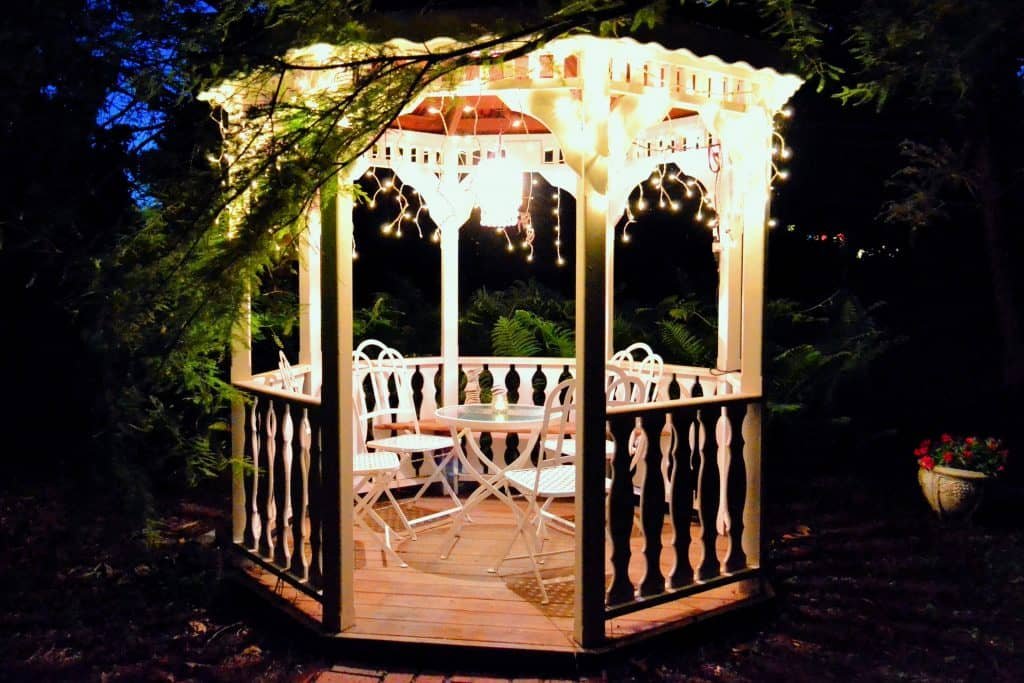
Gazebo
We haven’t created a gazebo yet, but we still have time. If you like more architecturally different structures, these are for you. They are usually round or octagonal and can be screened in.
BBQ Area
We definitely have a couple of different BBQ areas. One is the more built in look and the other can be rolled around wherever you need it. When the spring comes, we’ll probably create a built in look for our pellet grill so it has a more permanent home.
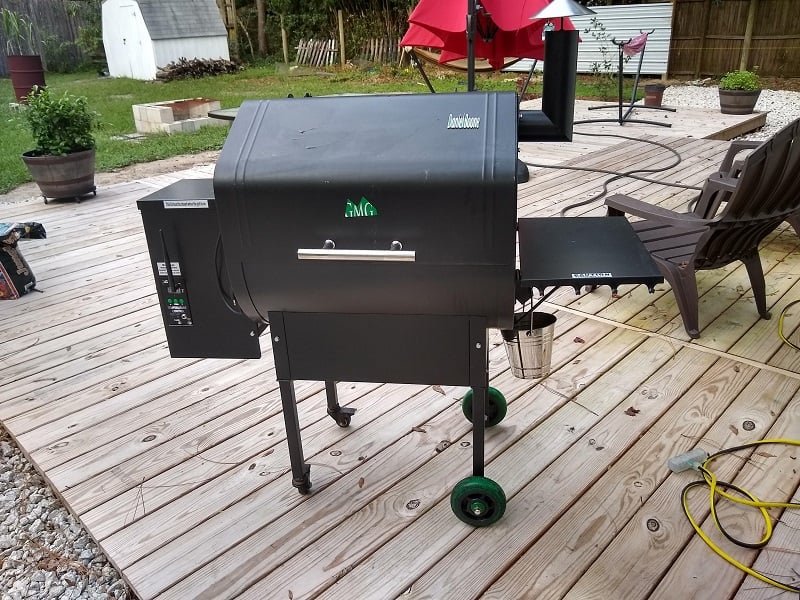
Here is a great built in BBQ area for your backyard.
Koi Pond
Our best friends’ neighbor let his pool go so he could turn it into a koi pond and thinks it way easier to deal with than having a pool. He also likes having more wildlife coming to his backyard now that’s it’s a pond.
If you’re looking for projects to do for the fall, check out our article on fall landscape ideas.

Waterfall
I love being near water, so having a backyard water feature is a great way to make you feel like you’re away from the city and it helps drown out any city noise.
You can make it as natural looking or as industrial as you want. If you set it up correctly to begin with, then the upkeep should be minimal on them.

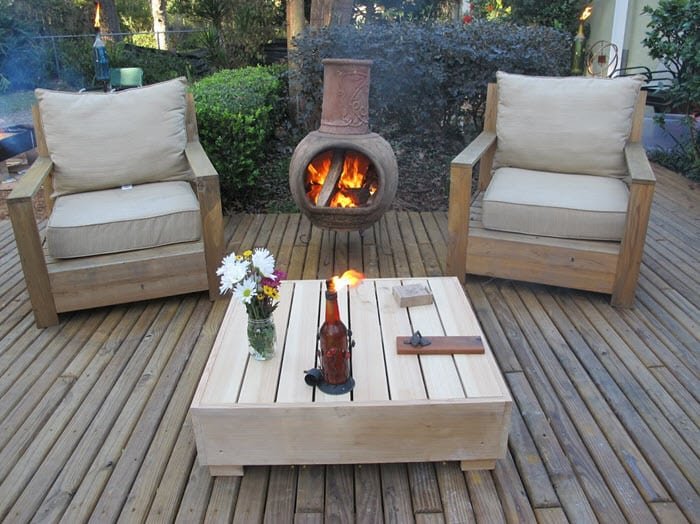
Chiminea Area
One of our favorite sitting areas at night includes a clay chiminea. They are pretty easy to light and super easy to keep the fire going in them. The clay pots help radiate the heat so when you’re sitting, you feel it’s warmth on a cold evening. The smokestack goes up through the chinimea and away from you and your guests.
We even made the outdoor furniture with this. We’ll show in a different post how easy it was to make.
You can also set up a great patio area. Just make sure you do everything to keep the patio heater from tipping over.
Lounge Area
Whether you love to lay in the sun or just enjoy the evening in a lounge chair, you can create a lounge area for that mood.

Seating Area
If you entertain a lot and want a place where you and your friends can sit and catch up, this is a great place to create a space for relaxing and enjoying each other’s company.

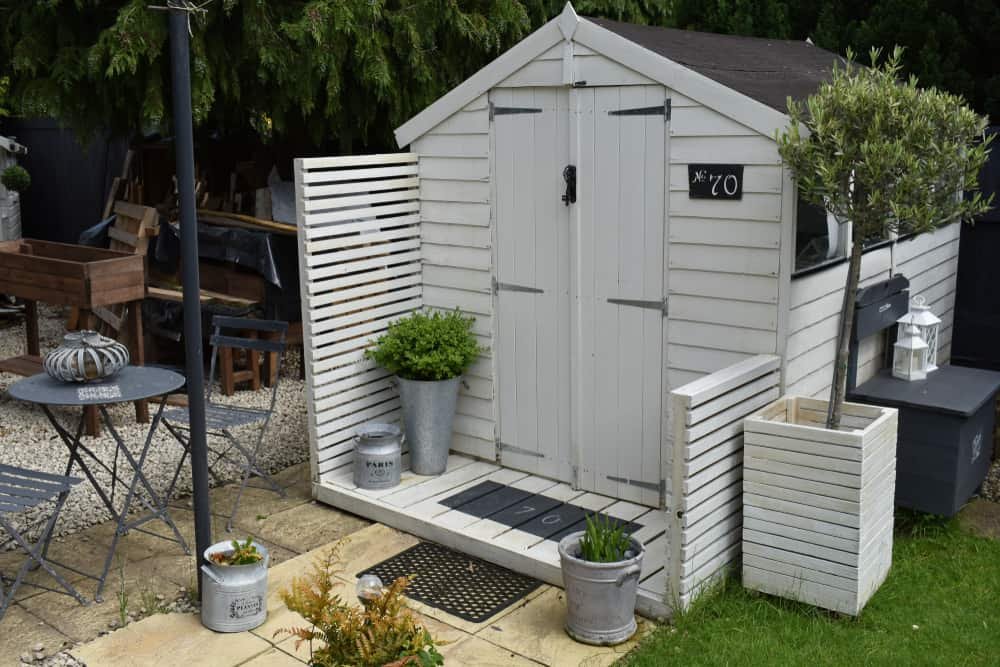
Vertical Garden Slat
Jena made this for a friend. Their old garden slats rotted away and they wanted something similar to take it places. It adds just a bit of depth and a little privacy to the area.
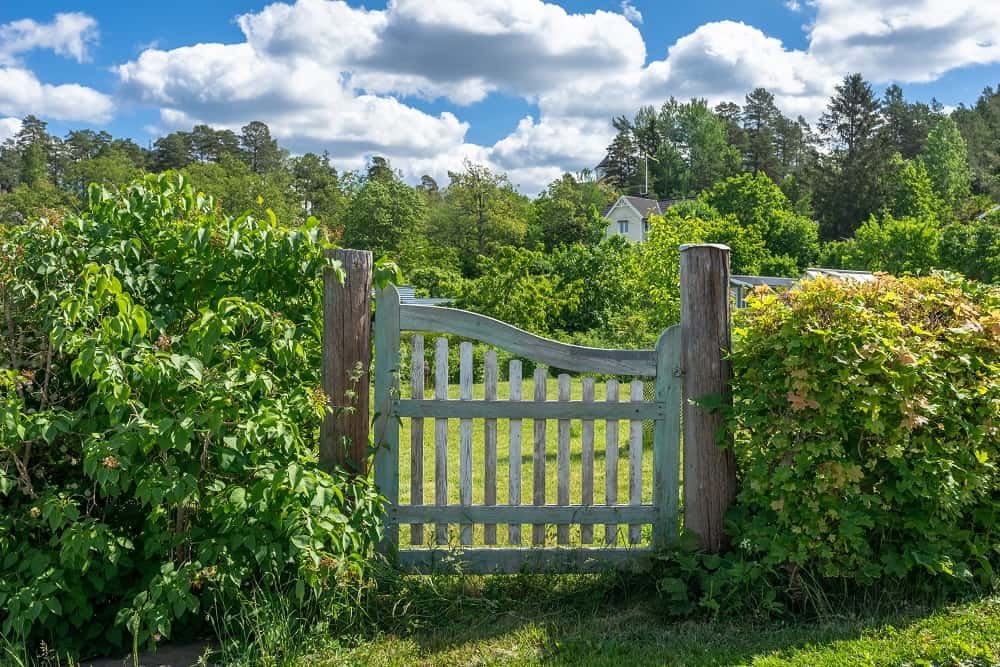
Garden Gate
Add a beautiful gate to your backyard so you know that you’re walking into something magical. We made this in two days and created the lattice work and curves all from normal tools.

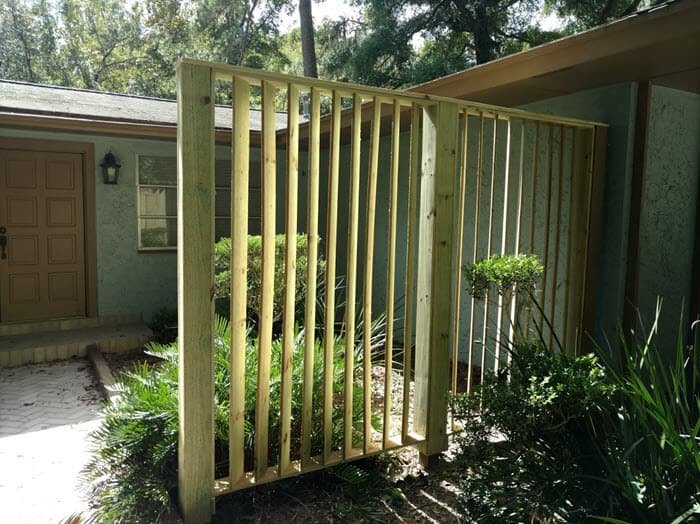
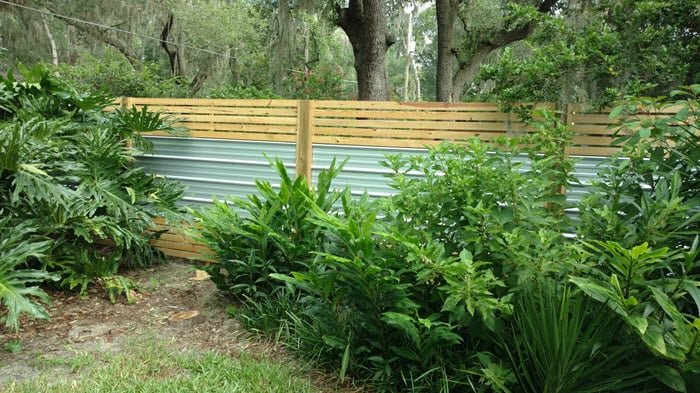
Privacy Fence
We love fences. But not just any kind of fence. We’ve been playing with fence and metal that brings a different look and feel to the backyard landscape. This one also cuts down on cost because the metal costs less than the cypress boards that we got.
Hope you enjoyed looking through most of these projects and got some inexpensive ideas for your own backyard landscape ideas. Feel free to share your favorite area in your backyard and why you love it in the comments below.