Budget Friendly Methods to Cover Dirt in Your Backyard

For many homeowners, a backyard is a place where they can relax and enjoy themselves. But a bare backyard full of dirt and weeds isn’t what most people have in mind when they’re thinking of spending some time outdoors.
Unfortunately, you may have to deal with this at certain times of the year. But is there a cheap way to cover the dirt in your backyard?
There are many affordable ways to cover the dirt in your backyard. You can cover it with ground cover, green it up with grass, or wood mulch and crushed concrete, among other things.
Your choice will vary depending on the look you’re going for. But if you don’t want to spend too much money, covering the dirt with mulch or crushed concrete is your best bet.
However, deciding which method to go for is easier said than done. With so many options to choose from, narrowing your choices down to one can be challenging.
That’s where we come in. In this blog post, we’ll share with you some of the cheapest ways to cover dirt in your backyard and help you make an informed decision about which one is right for your needs.
Table of Contents
Use Grass to Restore Your Yard to Its Former Glory
Most people choose to cover the dirt in their yard with grass because it looks good and is relatively easy to maintain, provided you have a green thumb. It’s also relatively cheap in comparison to other options. However, this method requires a bit of elbow grease.
The cheapest route is the slowest route by planting grass seed. If you have patience and a low budget, this is the way to go. If you can’t wait weeks for the grass to grow, sod is your best bet. Just know that you will pay a lot more for it compared to grass seed.
You’ll need to know when to install the grass seed or sod for it to take root. While most people choose Spring time, Early Autumn is also a great time due to the cooler temperatures.
You’ll also want to add compost to your dirt before you lay either seed or sod. You can purchase compost or make your own with the following ingredients, though making your own takes 2-6 months.
- Weeds
- Dead leaves
- Shredded paper
- Grass trimmings
- Manure, grass and other yard debris
Till the compost into the soil and water it sufficiently. Next, rake the ground until its smooth and level, then scatter grass seed throughout the yard. Keep watering the seeds until they sprout, making sure to keep the soil wet but not soggy. This should take about 7 to 14 days.
If you’re laying sod, the same steps above apply but after laying the sod, you’ll need to press down the sod to make sure it’s making contact with the dirt to help the roots take hold. A lawn roller rental works best for pressing down the sod.
It’s also crucial to choose the right grass species for your yard. Some species tend to be invasive and may end up causing more harm than good. Research which grass species will be best for your yard. A local hardware store or nursery should also your answers about the best grass in your area.
Create an Eco-Friendly Space with Recycled Bricks or Crushed Concrete
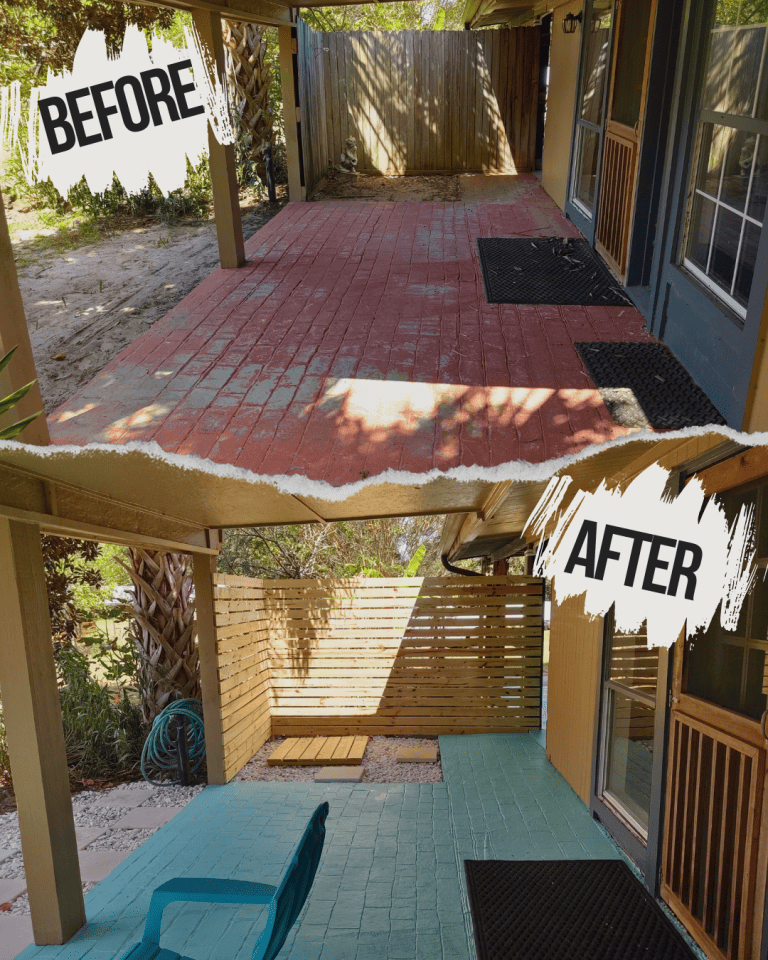
Recycled bricks or crushed concrete are an excellent alternative to planting grass, and what we chose in our own yard.
You’ll end up spending less in the long run over grass since there’s no maintenance costs. Plus, using recycled materials, keep those items out of landfills. What’s more, there’s no worrying about constant watering or putting chemicals in your yard.
Crushed concrete looks similar to gravel, but not quite as nice. It is made from demolished concrete that is ground down into different sizes. The cost is about half the cost of regular gravel making it a great deal if you have a large area to cover.

Laying Crushed Concrete
- Make sure your area is level and firm.
- Install weed fabric to help control weeds before spreading the gravel.
- Try to get the crushed concrete delivered as close as possible to the area.
- Use a shovel or bucket to spread the crushed concrete. If covering large areas a wheelbarrow will help.
- Use a hand tamper or rent a vibrating plate compactor to compact the gravel in place.
Note that spreading gravel is much harder than spreading mulch due to its heavier weight. It took us half a day to spread mulch and over a week to spread the same amount of gravel so be ready to get a workout!

Laying Recycled Bricks like Pavers
- Remove 3 inches of soil.
- Add 1 to 2 inches of sand using a tamper to level and compact the sand for a firm base.
- Arrange the recycled brick in a pattern over the sand.
- Spread a layer of sand on top of the bricks.
- Compact the sand down in between the bricks with a vibrating plate compactor.
- Sweep the excess sand away from the bricks.
You can also add color to the space you’ve created by adding decorative stones or pavers around the perimeter of your new recycled brick patio.
Consider adding some potted plants, a sitting area and a patio umbrella to elevate the look of the space. And that’s it! You now have a gorgeous spot for hanging out and relaxing on a budget.
Cover the Dirt with Ground Cover

If you want to cover your dirt yard with some greenery, but grass isn’t an option, you can do so by planting ground cover. Low creeping plants are great for covering the ground and creating an instant garden.
Some examples of ground cover that can fill up every part of your yard include:
- Sun-loving ground covers, e.g. creeping phlox, creeping thyme and creeping jenny
- Shade-loving creepers, e.g. bugleweed, bowles periwinkle vine and mondo grass
The best thing about using ground cover is that it’s pretty easy to find a neighbor who’s willing to share some cuttings with you and share tips on how to take care of them.
However, if you’re ready to spend some money on the process, you should purchase established plants because they will require less time and effort to grow, unlike seeds that take months before they reach their full potential.
Also, keep in mind that not all ground covers are suitable for covering large areas. Furthermore, some species are invasive. Therefore, you should research the species before making any purchase.
Play It Safe with Mulch

If you’re unsure what your future landscaping project will look like, you should consider using mulch. It is low cost, and it also provides several benefits such as weed control, suppression of soil erosion and moisture conservation.
We used mulch on the side of our front yard to cover the dirt where we parked our car. We were constantly tracking dirt into our house.
Our friends took down an unhealthy cherry tree and had it mulched up to spread in their yard. They called us since they had extra to give away and we gladly accepted it.
It only cost us our time to gather it up and spread it in our yard. The added benefit was the organic materials released in the ground helped our front a yard tree look much healthier 6 months later.
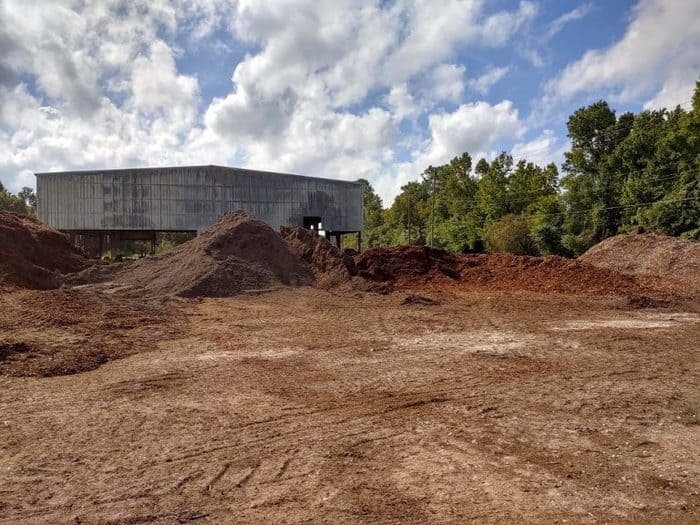
The most common type of mulch used in homes is larger bark chips because it looks good, easy to install and won’t disintegrate as fast as smaller mulch items. If you’re lucky, you may live in an area with tree trimming firms that gladly giving away leftover chips to use in your project.
Our second backyard mulching was leftover mulch from our city’s tree limb trimming around power lines. It was free, but it definitely didn’t look as nice as the bark chips we currently have in our yard, shown in the picture above.
Time to Give Your Backyard a Facelift
You don’t have to live with a dirty yard because you’re strapped for cash. As you can see, you can achieve a beautiful look with little to no investment. Whether you choose to use wood chips or stone, you can’t go wrong.
However, be sure to research the method you’ve selected to ensure you’re not doing more harm than good to your soil.
Most importantly, before deciding on a permanent solution for your yard, be sure to consult landscaping experts to ensure that what you do is entirely safe and environmentally friendly. It’s always better to be safe than sorry!