
How To Cut Half Lap Joints For Backyard Projects
You might be wondering what is a half jap joint and why do I need to know how to cut one. If you plan on doing any DIY projects around your house, you will definitely need to know this joint. I use this joint every time I build a gate.
A half-lap joint is where half of each board’s material at each end is removed and they overlap one another at a 90 degree connection.
Half Lap joints provide a sturdier wood to wood connection than a standard butt joint or pocket screws. This is critical if you want to build a fence gate that won’t sag. Half laps are how I build all my larger gate frames as well as extend fence posts.
Half laps are generally used on the end of each board, while a cross lap joint is at the end of 1st board and in the middle area of a 2nd board.
Table of Contents
Several Ways to Cut a Half Lap Joint
You can build half laps in several different ways depending on the tools you have. No matter if you just have hand tools or a large sliding miter saws, this joint is not complicated.
My half lap joint building has evolved from using a circular saw and chisel to now using a sliding miter saw and chisel. I’ve seen other people use a circular saw and hand saw which works well for 6×6 posts and larger.
As an Amazon Associate I earn from qualifying purchases.
More precise interior finish grade half laps can be made on a table saw with a dado blade and/or a routing table. The methods we describe below are perfect for outdoor projects.
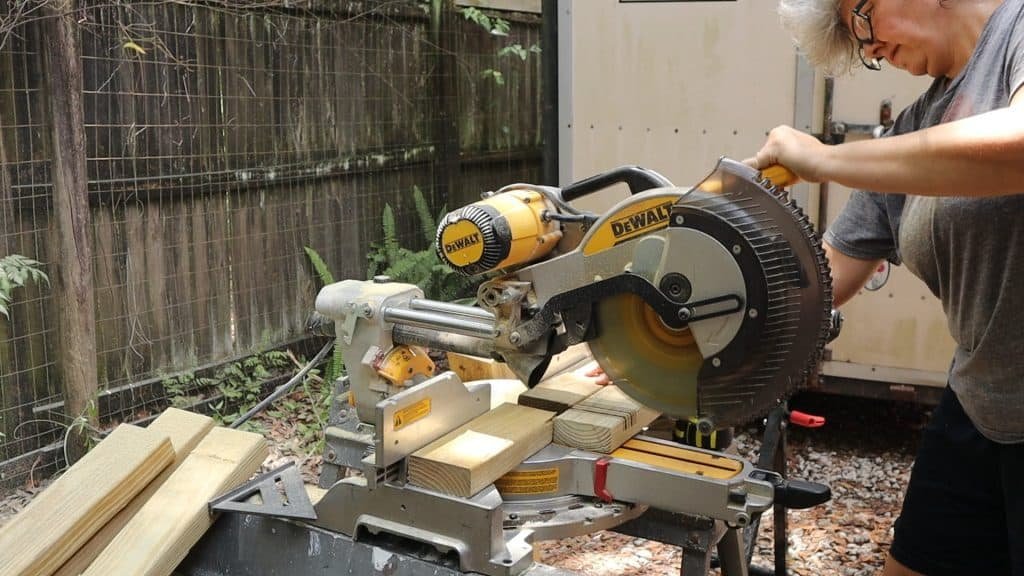
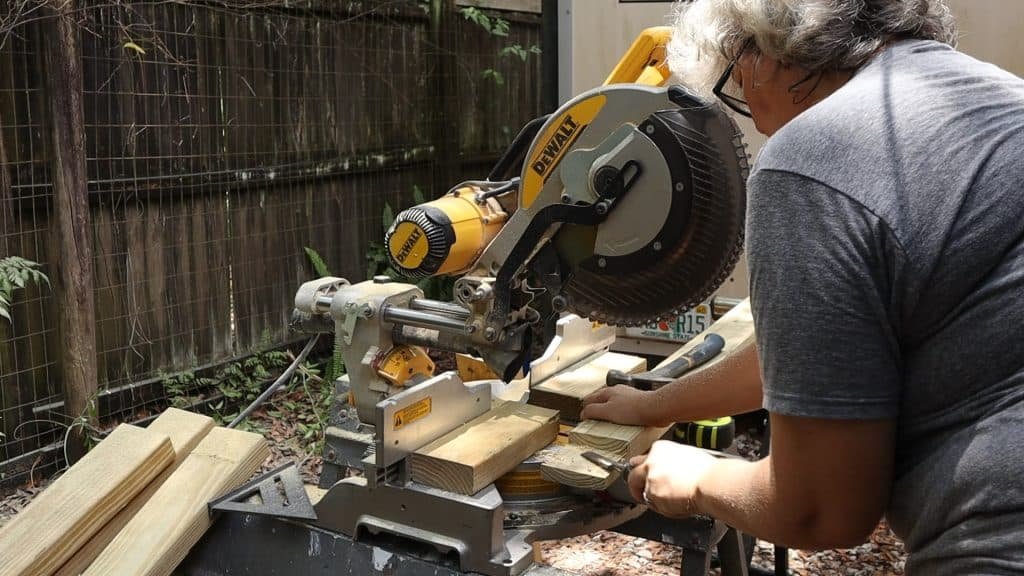
Method 1 Sliding Miter Saw and Chisel to Make Half Lap Joints
The first method we’ll showcase how to cut a half lap joint with a sliding miter saw and a chisel. I’ll showcase how to cut the half lap joints as well as building the gates themselves.
I was building new gates for a friend, so I documented how to build half laps with my sliding miter saw using 2x4s. I’m building (2) 3 feet wide by 6 feet tall gates using (4) 2x4x10 boards.
To optimize my lumber I purchased 10 length boards rather than 8 feet boards. I can get a top board and side board out of one 10 foot board, while I would need (2) 8 foot boards since the leftover cut is only 2 feet wide.
If I was being uber efficient, a 12 foot long board would have been best, but longer pressure treated boards are very heavy and more difficult to transport. So pick lumber that will be more efficient while also still easy to transport back to your home.
Tools needed were saw horses, a sliding miter saw, a sharp chisel, hammer and a rolling stand to support the longer pieces of wood.
First step is to cut the boards down to final size. Since you are overlapping, there’s no need to have to calculate anything. Simply cut all the boards to the final measurement. In my case my top and bottom were 36 inches while my two sides were 72 inches.
Setting Miter Saw Cut Depth
Set the sliding miter saw to cut half the depth of the 2×4. I needed the saw to cut .75 inch from the 1.5 inch thickness. My sliding miter saw has a depth stop that will stop the saw blade at a certain height. If you’re using a circular saw, hold the blade against the board at the half way mark and set the depth.
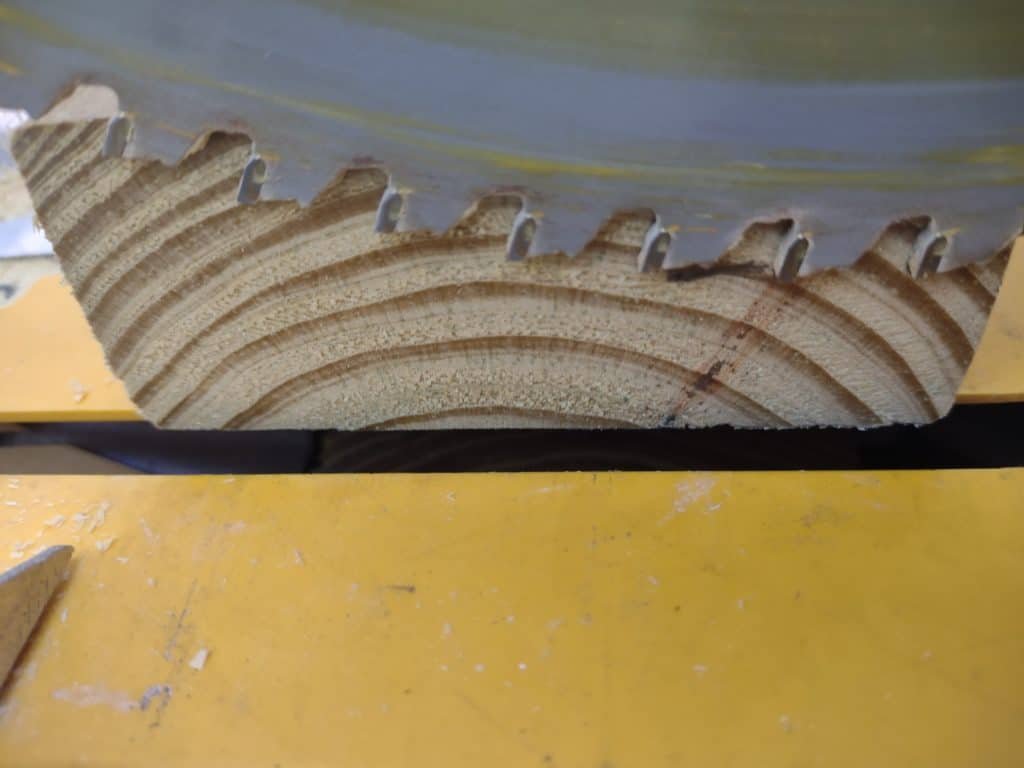
One downside to cutting a half lap on a miter saw is the circular shape of the blade. As you’re sliding the blade back, your blade won’t go all the way to the correct depth on the back part of the board.
You can actually see this on the pic above with the board resting against the fence.
That may sound very technical but it just means you need a sacrificial board behind your piece of lumber so the circular blade cuts to the desired depth throughout your entire piece.
Use a cut off board to get the depth right on the saw. It is easier to cut more away than ruin a board by cutting too deep. Some pressure treated boards have slightly different depths and you may need to tweak your depth for thicker boards.
Cutting Kerfs
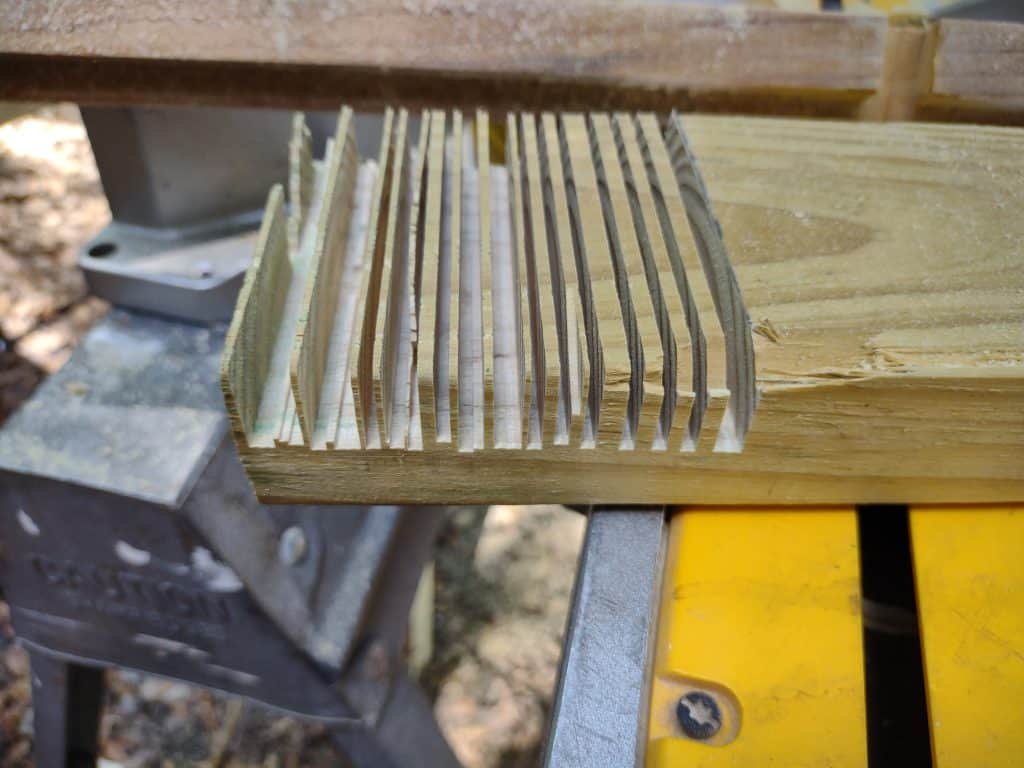
With the depth set and your board marked for the 3.5 inches to start the cut, you’re ready to make your half lap joint. Your first cut will always be the furthest and then work your way to the edge of the board.
You will make many cuts or kerfs in the board. I try not to leave anything greater than 1/8 of an inch for easier removal with the chisel. Once all the cuts are done, take your hammer and tap the end of the kerfs to remove them.
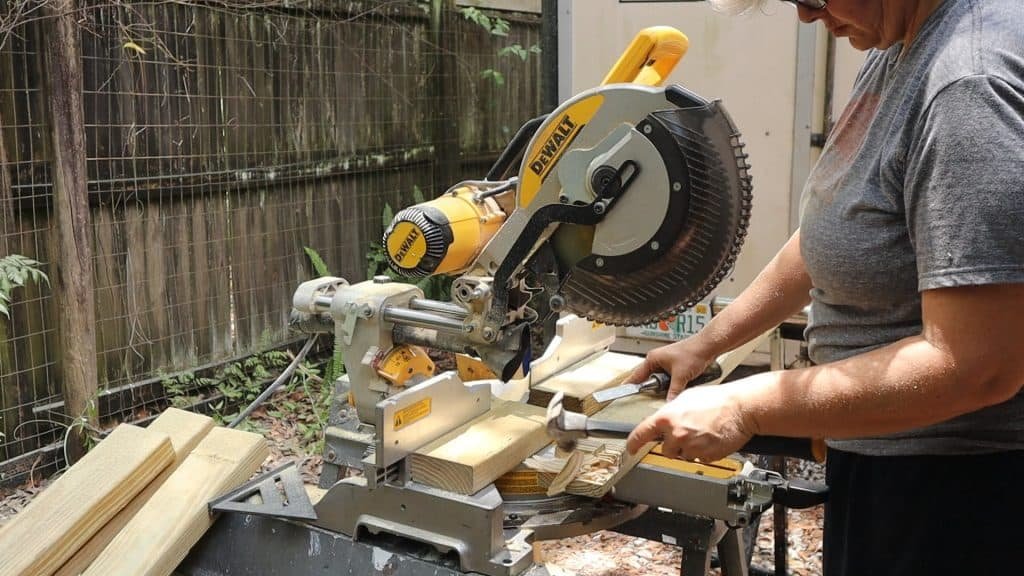
You should be able to remove most of the material this way other than small nibs on the bottom of the board. Now you can take your chisel and slide it across the grain to smooth out any bumps. If you’re using a hardwood species, you may have to use a rasp to get a cleaner bottom.
I start with one top and one side so that I can test fit the pieces together after they have been cut. Like I said earlier, sometimes pressure treated wood is slightly different sizes.

In my case, the width of the boards were slightly more than 3.5. Which means I needed to take one more cut off the edge for the 90 degree joint to come together.
It took about an hour to make all the cuts and then another 15-20 minutes to finish all remaining tweaks. For my project the next step is to dry assemble the gate and then glue, clamp and screw the half lap joints together.

Hand Saw and Chisel Method to Cut Half Lap Joints
This method is by definition easier as it only requires one hand tool, but in my opinion, it can be harder to accomplish. You need a very sharp and stiff hand saw blade and a steady hand to cut the joint perfectly.
Take your time to measure and mark the material on all sides as you will need to see where your saw is cutting. You’ll cut the width first and then cut the thickness. Clamp your board well so it doesn’t move during the cut.
Since the best way to cut the thickness is cutting the board vertically, this method works best with shorter material. You can fine tune the cut with a sharp chisel.
Circular Saw and Chisel Method to Cut Half Lap Joints
If you have limited power tools, this is a great method to learn how to cut half lap joints. First you will need to mark your cut on each board. You will be taking half of the board’s thickness the width of the adjoining board to form a perfect 90 degrees.
After you’re marked the half point of your material to remove, lay your circular saw on top of the board with the blade hanging off the side.
Now set your saw blade depth so that the bottom of the blade hits right at your depth mark. Ex., if your board is 2×4 or actual dimension (1.5×3.5), you will be removing .75 thickness and 3.5 width off each board.
With the width marked, run your circular saw down the marked line with a speed square as a guide to cut a perfectly straight line. Now you’ll take multiple passes going toward the end of the board, trying to leave less than 1/8 thick kerf of material.
Take your hammer to quickly remove the majority of the remaining material. Now use a sharp chisel to remove the remaining small bumps to leave a smooth surface. Try to run your chisel over the board at a flatter angle.
Repeat this process for the second board and then test fit your joint. If either board hangs over the side, you’ll need to cut more width off. If either board sits higher in the joint, you’ll need to remove more thickness.
Conclusion
Hopefully I’ve shown you why you should learn to cut a half lap joint. In the process, I hope you’re able to use a half lap joint on a future gate project. Good luck with your next backyard project!


