Step-by-Step Guide to Extending Wooden Fence Post Height
There are several reasons why you might need to extend your fence post but the most common is wanting more privacy or security with a taller fence.
Most municipalities allow a fence to be 8 feet tall without needing a permit for a taller fence. Homeowners with an existing 4-6 foot tall fence might realize their neighbors can see into their backyard. If you build your fence from the start, you can make it the height you want.
If you have a 6 foot fence you can extend the post 2 more feet with lattice or a different fencing material. Another reason to extend your post is if your post has rotted midway up or it sustained sometype of damage and broke.
On the off chance that the post is completely rotted away, you will need to remove the post and install a new one.
The methods of extending the height of your post will work if you want more privacy or if you need to replace a broken/rotten post and install a new one on top to keep the same height.
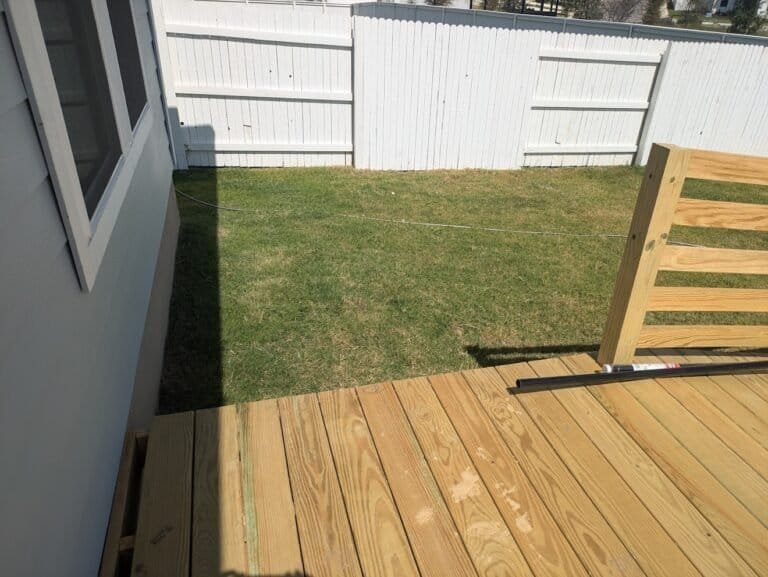
We came across the picture below for a backyard fence that was close to a main road. They were able to extend their fence two feet to give them more privacy and possibly block out road noise.

Table of Contents
As an Amazon Associate I earn from qualifying purchases.
Fence Extension Types
There are three different ways to extend your wooden fence post. The two easy ways are adding a metal fence post extender fastener to both posts on the front and back or adding a wood face board on the front and back of both posts.
The third way is a bit more difficult since you have to create a half lap joint on each post and then connect the posts with through bolts. Let’s dive into each method.
Metal Fence Post Extender
The metal post extender may be called “heavy duty tie plate” or “mending plate” or “tie strap” but it’s essentially a wide piece of thick metal that goes across both front and back sides of the posts to reinforce the joint and transfer tension loads.
This metal plate from Simpson is 12 gauge which is thicker than the ones you find at the local lumber store that are 20 gauge. The lower the number, the thicker the gauge of metal for future reference.

I also like that it is 16” long which allows 8” on each post to help transfer the load. I would install this strap with structural connectors rather than regular nails or screws to give it more support.
I have used structural nails

and structural screws

and found the screws are easier to install and fewer injuries from a stray hammer blow to the thumb or knuckle from holding the nail. Ask me how I know this…
Nails will also find the random wood knot and go sideways on you. Either are considered structural, which is what you want to keep both posts together.
Recommended Items
Wood Fence Post Extender
Just like the metal extender, you can attach a 1×4 piece of lumber (actual dimensions are ¾ x 3½) to the front and back of the posts.
Whereas the metal may only be 16 inches long, you could do the same length in wood or you could use an even longer piece of wood to completely cover the front and back of your adjoining posts. This would make the extension look seamless.
Sometimes a wood 1×4 face board is used to cover the uglier pressure treated 4×4 post. So if you already have a face board on your fence posts, you would simply need longer face boards to extend your current post with another post.
My recommended attachment method for the face board is structural screws that are longer than the ones above. Structural screws are made from stronger steel and are heat-treated for maximum strength.
Depending on the type of wood, you may need to pre-drill the face board so you don’t split it and compromise it’s strength. Most soft woods such as pressure treated pine, cypress or cedar will need to be pre-drilled.
Half-Lap Joint With Through Bolts

Cuting a half-lap joint is not difficult but you do need to pay attention to your measurements. The old saying measure twice, cut once is always right. I sometimes measure things more than twice and still make a bad cut every once in a while.
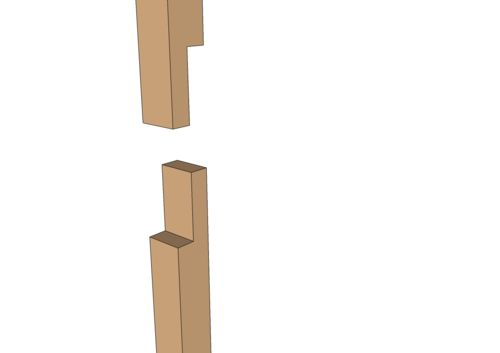
You want your half-lap joint to be the same height which is generally 6-8 inches down on both posts.
It’s called a half lap because you are cutting half of the material a certain distance down from each post. When you attach them, it will form a joint that is the full thickness across both posts.
In this case, the picture above helps explain what it looks like on two vertical posts that are then connected with two or more through bolts. This article from This Old House shows how to create a half lap joint with a circular saw and sharp chisel.
The key is cleanly getting rid of the leftover wood between the saw kerfs. A flat wood rasp will help clean up any bumps from the saw kerfs. You need at least a ⅜ thick – 4 inch long galvanized bolt to connect the posts properly.
The video below also shows a hybrid method of cutting with a circular saw on both sides and cutting the rest of the wood with a hand saw. This might be the easiest way to cut the post that is already installed since you can’t move it around.
This is my preferred method and faster than cutting a bunch of kerfs sideways on the installed post. The kerf method will work fine for the top post that can be positioned sideways.
Conclusion
I hope this article explained in detail the three different methods to extend your wood fence post.
I think choosing the specific method may boil down to your current fence style and the style of the extension you will be adding or if you’re joining two posts for something other than a fence.
If you currently have face boards over your posts, the second method would blend in seamlessly. If you don’t have face boards already, the quicker method would be with the metal hardware plates.
Finally, if you are extending two posts for something like a deck, then the strongest most structurally sound method is the half lap joint.
To our readers from Great Britain, there is a metal sleeve that you can use to extend wooden fence posts. I really wish this product was available in the United States but I’ve searched everywhere and can’t find it.