How to Build a Fence for Your Backyard (Step by Step)
Are you wondering how to build a fence for your backyard?
Building a fence can be a daunting task. There are so many factors to consider, including the type of fence, the materials, the height, and the style.
This article will walk you through everything you need to know about how to build a fence. We’ll discuss the different types of fences available, the materials you’ll need, and the steps to put up your new fence.

Table of Contents
Types of Fences
There are many different types of fences available on the market today. How much a fence costs will depend largely on the material and style that you choose. The most common types are wood, vinyl, and chain link. Many people are looking for privacy fence ideas to keep their backyard private and secure when installing a fence.
Wood fences are the most popular type of fence. Most wood frames are made from pressure treated wood that lasts longer than untreated wood. Wood fences have the most diverse styling choices.
Many also want to choose a fence that lasts the longest. Vinyl fences are more expensive, but they require less maintenance than wood fences. Surprisingly, fences made with metal corrugated panels last a long time without costing as much as some vinyl fences.
As an Amazon Associate I earn from qualifying purchases.
Chain link fences are one of the cheapest fences to build, but they are not as attractive as wood or vinyl fences. But there are ways to cover fences cheaply, so they don’t look as bad.
We’ll cover what you need to install a wooden fence for this article.
Tools and Materials Needed
- Work gloves
- Eye protection
- Hearing protection
- Auger powerhead and bit (optional) Materials
- 4 x 4 treated posts or metal posts
- 2 x 4 treated lumber
- Concrete mix
- Exterior screws for rails or rail brackets
- Mason line
- Weather resistant fence pickets
- Nails, screws, or staples
Check property lines and local building codes
Before installing a fence, it’s important to check your property lines and comply with local building codes. The first step is to find out where your property lines are located. This will also help you find out if a fence is yours.
You can do this by looking at your deed or contacting your local planning department. Once you know where your property lines are, you can start planning where to put your fence.
It’s also important to familiarize yourself with local building codes, as they will dictate things like the fence height and style. If you have an HOA, you’ll want to get their approval as well as they can fine you if your fence isn’t approved.
To find out the codes in your area, you can contact your local building department or search online. By taking the time to research your property lines and local building codes, you can be sure that your backyard fence will be installed correctly and in compliance with the law. This might also help figure out the easiest fence to install if you’re doing it yourself.
Plan Your Fence
Once you have your property line marked, you can start planning the size and style of your fence. If you have a small yard, you may want to consider a picket fence. If you have pets you’re trying to keep in, then we have in depth fence ideas for your dogs.
For something a little different and with a more modern style, we also have horizontal fence ideas.
For a larger yard or if you don’t like your neighbors looking in your backyard, you may want to choose a privacy fence. Once you have decided on the size and style of your fence, you need to select the materials.
Wood fences are a popular choice because they are durable and easy to customize. However, they require regular maintenance for optimal life span.
Measure and mark the layout
The next step is to mark the fence line. This can be done with string or spray paint, but preferably both. Before you start digging, call 811 (in US) to locate any underground utilities. The last thing you want to do it cut through a cable line or even worst, a water line.
Once the fence line and any utilities are marked, you can begin installing the posts. Corner posts should be set in concrete for a wood fence while the other posts can be set in gravel or concrete. Metal posts will also need to be set in concrete for a vinyl or chain link fence.
How to Dig Post Holes

First, you’ll need to mark out where you want your post holes to be. Typically, they should be spaced 6-8 feet apart, depending on the panel material. The easiest way to know where your interior posts should be located is to set your corner posts first.
Once the concrete is set on the corner posts, run a string between the two posts. Make sure your string is tied on the outside of each post without any slack.
I like my posts to be evenly spaced along the line, rather than a straight 6 feet then possibly 3 feet at the end. To me, a fence with unevenly spaced posts at the end of the run looks cheap.
For example, the back of my yard is 75 feet across. To find out how many posts I need I’ll divide 75 feet by 6 feet (distance between each post) which tells me I need 12.5 posts. I can’t have a half a post, so if I divide 75 feet by 12 posts, I get 6.25.
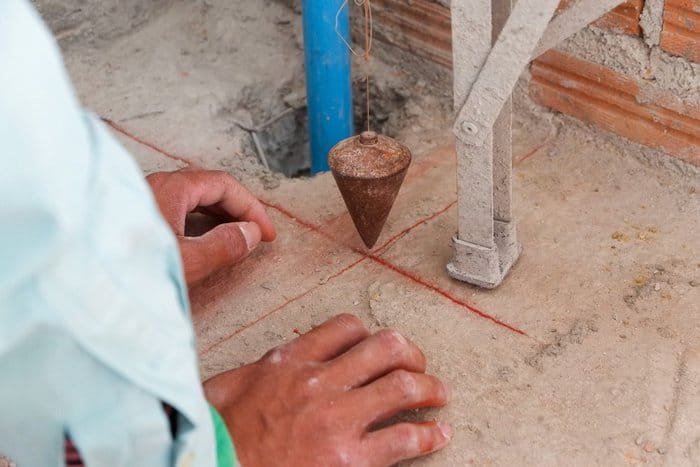
This means I’ll space each post by 6 feet 3 inches, (75 inches) give or take a few inches for each post. Now I won’t be stuck with a small section at the end. If you’re not sure about the exact location of the post hole, use a plumb bob tied to the fence string to find the vertical placement of the hole.
Always follow the 1/3 method for knowing how deep to dig to bury your post. This method provides the best post stability and helps to calculate what size posts you need to buy.
For six-foot-high posts, your holes should be two feet deep, or 1/3 of the size of the post above ground. 6 foot high post divided by 1/3 = 2 feet in the ground. Adding the 6 feet above ground and 2 feet below ground says you need an 8 foot tall post for a 6 foot high fence.
If you want your fence to go higher, there are ways to extend the fence post heights.
Once you know how deep to dig your holes, it’s time to install the fence posts. If you have a lot of large yard and lots of holes to dig, you may want to rent a power auger from your local home improvement store.
These are powerful machines and should only be used if you have two people to hold it!
If you have a lot of rocks or large tree roots near the post holes, be careful when using an auger in these areas. The auger can suddenly jerk when it hits one of these and cause injury.
A manual post hole digger also works well and is easier to use by one person. I have built many large fences solely with a manual post hole digger by myself. Do not use a shovel to dig post holes. A shovel will create a wide hole that results in a very unstable post.
With your post location marked, start digging your hole. For a 4×4 post, I want my hole to be 6-8 inches wide only. Most auger blades are approximately that wide, so you can go down in one movement.
A manual post hole digger will only create a 4-5 inch wide hole, so you’ll need to move it dig a little bit wider to get to 6-8 inches wide.
Tip, if using manual post hole diggers, measure 24 inches or 2 feet from the blades up the handle and mark a line. With the diggers in the hole you can now tell how close you are to 2 feet with the line on the handle to the top of the ground.
Once you’ve gotten close to 2 feet, you’ll want to make an inverted V with the bottom of your hole. Meaning you want your hole to be larger or wider at the bottom and smaller at the top. Angle your post hole digger to dig out more dirt all around the bottom of your post hole.
Unfortunately, many people dig the opposite with a wider hole at the top and it creates unsecure posts.
Make sure to dig at least 6 inches more, or 30 inches total to include gravel at the bottom of the hole. The gravel helps keep standing water from soaking into the bottom of the posts which prevents premature rot.
Position Posts in Concrete
Set your post in the hole on top of the gravel. Attach the post hole level to verify level on both sides. You want your leveled post to just touch the string line to make sure it’s in line with your corner posts. If your post is not level and moves the string considerably, you need to re-position the post.
With one person holding the level post in position, mix your concrete and pour it into the hole around the post. To start, only fill half your post hole and re-verify that your post is still level and in the correct position. If everything looks good, finish pouring the rest of the concrete in the hole.
Your post shouldn’t move once the concrete is poured in each post hole, but if it does, you will need to attach side support brackets to keep it in the proper position.
Be sure to slope the top of the concrete away from the post so water doesn’t sit on top of the concrete and seep into and around the wood post. Finally, allow the concrete to cure for at least 24 hours before attaching your fence panels or rails and pickets.
There is fast setting concrete that will set in 20-40 minutes if you need to put your fence up quickly for containing animals. Be careful using this type of concrete if this is your first time setting posts. The concrete can harden quickly before the post is properly positioned and will create a lot of extra work removing and resetting the post.
Adding concrete makes your fence posts sturdier, but it makes it difficult if you’re the one having to remove fence posts for an older fence you’re replacing. So choose wisely if you decide to concrete each fence post.
If using gravel only on the internal posts, have someone hold the post while pouring the gravel in the hole. You should tamp the gravel every 6-12 inches in depth to make it rock solid. Check after each tamping to verify post is still level and in line with other posts.
If your yard is on uneven ground, there are ways to level fence posts. To keep the tops of your fence posts at the same height, you can either add more dirt to the bottom of the fence or you’ll need to create a stepped look fence.
Install rails to the posts
For fences shorter than 5 feet, you only need two rails. A 6 foot high vertical board fence, will need three fence rails. If your fence is 8 foot or taller you might need four rails. Try to keep a maximum distance of 24 inches between rails.
Determine if your fence rails will be installed in between each post or installed on the outside of each post. Measure the distance between each post. This will be the measurement for rails installed in between each post.
If installing rails on the outside of each post, take the measurement number and add 3.5 inches or the width of one post. This is the length of the rail to be installed half way across the front of each post.
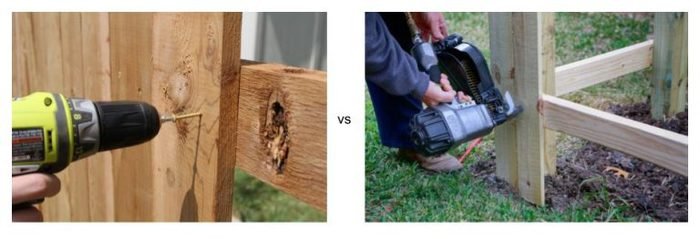
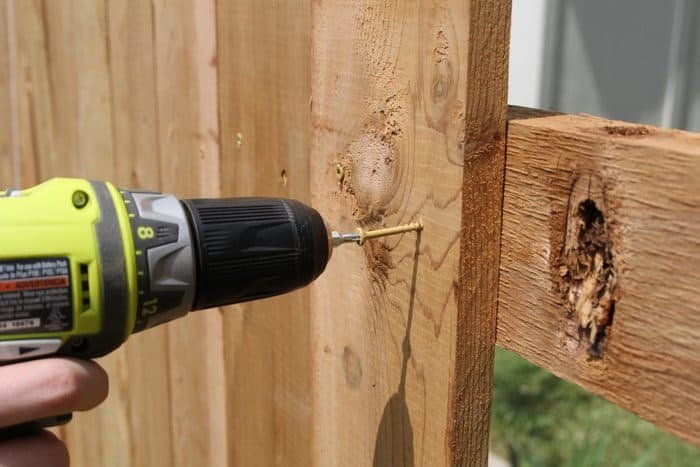
If you’re attaching the rails in between your posts, the best way is to use pocket hole joinery with screws or rail brackets. If you’re attaching the rails to the front of the posts, use can use screws or framing nails.
Use a drill to create pilot holes for the screws you will use to attach the rails. Once all of your pilot holes are drilled, you can start attaching the rails. Be sure to use screws or nails that are long enough to ensure a secure connection. I use a minimum length of 3 inches, sometimes 3.5 to 4 inches depending on the situation.
Finally, check all of your rail connections to make sure they are tight before moving on to the next step in your fence installation.
Attach fence pickets
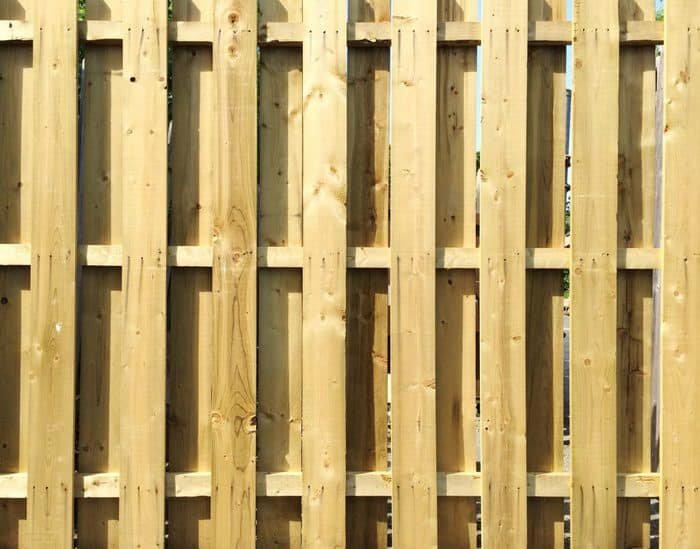
There are a few different ways to attach fence pickets. You can either have a shadowbox fence, a board on board, or side by side. Many people go with the shadowbox fence, so they don’t feel like they have to give their neighbors the good side of the fence.
With a shadowbox, everyone gets the good side since the pickets are installed on each side of the rails. This type of fence will need the rails installed in-between the posts.
Before attaching fence pickets, it is important to choose the right type of wood. Cedar and redwood are good options because they are naturally resistant to rot and insect damage. Once you’ve decided on the style, it is time to attach the pickets to the rails.
There are two main ways to add fence boards: using screws or nails. If you are using screws, certain screws work best for wood fences. Polymer coated exterior screws or stainless steel screws are best for installing fence boards, while exterior rated structural screws are best for attaching fence rails to fence posts. Drill pilot holes first to prevent the wood from splitting.
If using nails, use galvanized nails to prevent rusting. You’ll also want to choose the right gauge nail as well as the nail gun for the fencing project.
Whichever method you choose, ensure that the pickets are evenly spaced and securely attached before moving on to the next step in your fence installation project. The easiest way to keep the same space is to create a jig that will do the spacing for you throughout your project.
Install the gate
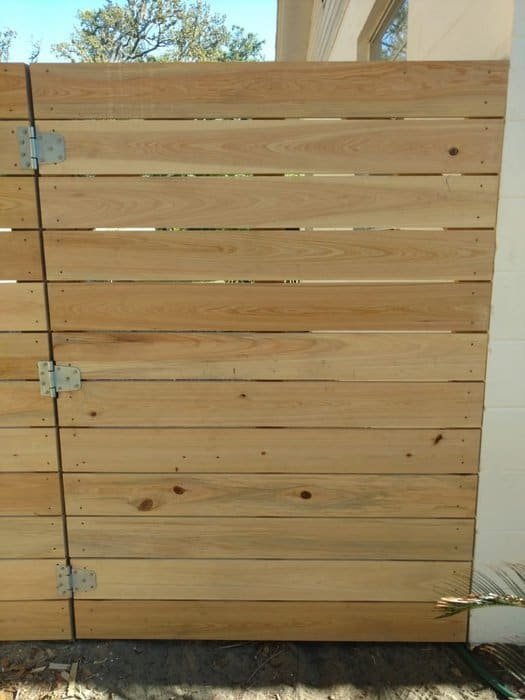
Before installing a gate for your fence, you will need to determine where the gate will be located and how wide it needs to be. Once you have these measurements, you can purchase a gate frame kit or build your own. If you’re new to fences, I recommend getting a gate frame kit since it makes it very easy.
Most gate kits come with everything you need to install the gate, including the hinges and latch. Before you begin, it is also important to make sure that the posts on either side of the gate are level. Make sure you purchase a quality gate kit that is well built.
We also have some tips on how to build a fence gate that won’t sag if you decide to build your own gate.
Once your gate frame is put together or built, start by attaching the hinges to one of the posts. If you have a double gate, position each gate frame and attach to each fence post. The easiest way to do this is use spare wood underneath for the gate frame to sit on to make it easier to keep the frame level to attach the hinges.
With the frame attached to your post, you’re ready to add the pickets. I’m usually building fences by myself and it’s easier to hang a gate without the extra weight of the attached pickets but if you have more people, you can certainly do it the other way around as well.
Finally, add the latching mechanism and handle.
Stain or Treat the Wood
After installing a new wood fence, you’ll want to protect it from the elements. One way to do this is to stain or treat the wood. How long you need to wait before staining your fence depends on a lot on the type of wood used and your climate.
Staining will help prevent weathering and rot, and it will also give the fence a uniform appearance. There are a few things to keep in mind when staining your new wood fence.
First, make sure that the wood is dry before you begin. If it’s damp, the stain or treatment will not absorb properly and you will have wasted a lot of money on the stain product.
Second, choose a exterior stain that is suited for your fence. Third, follow the manufacturer’s instructions carefully. With proper care, your wood fence will last for many years.
You can also paint a fence if you want more color.
Conclusion
Building a fence doesn’t have to be complicated. With this helpful guide, you can easily install a new fence in your yard. With a little bit of effort, you can have a beautiful new fence that will last for years to come.