How to Level Fence Posts on Uneven Ground?
Putting up a fence can be completed by even the most inexperienced homeowner. It is a meticulous and tiresome task but with a little hard work and studying. You can do it! But depending on what type of fence you build and where you live, you might find yourself facing uneven ground.
It can be difficult to find the right instructions to complete this task, but with this information, you will be putting up your fence posts in no time. Keep reading for how to level a fence post on uneven ground.
Gather Your Tools
Tools are a person’s best friend, especially when it comes to construction work. You will need the right tools to make this process go a little more smoothly for you. These are the tools you will need:
- Concrete
- Gravel
- Auger or digger
- Sharpshooter shovel
- Level
- Electric saw
- Pencil
- String
- Protective gear: gloves, eyewear, mask
Once you have gathered all your tools, you will need to decide how you will style your fence. Plan out what you need to do from there, and then begin!
Level the Ground and Install Based on Fence Style
There are three main ways to style your fence to make your yard look professional. These styles make it easy to level your posts while making sure your house is presentable to the world. You’ll want to consider each one as you’re learning how to build your fence.
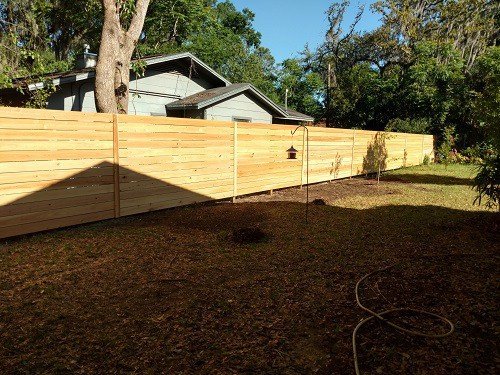
Level Topped Fence
Level topped fences are the same style as if you were to install a fence on a flat surface. The best way to install fence posts in this area is to get taller posts for any dips or lower ground level.
- First, mark where you will be installing the posts about 6 to 8 feet apart.
- To install the post, you will still do the same process of digging a hole, putting in gravel and concrete around the post. Now the posts may be uneven near the top, but this will be fixed near the end.
- Make sure your posts are level vertically before you let the concrete dry. If you don’t, you will have to redo your installation of that post.
- Once your posts are set in concrete, you will figure out where the top of your fence will be on the posts. The easiest way to do this is to find the lowest height post and then mark the other posts to be cut down to that level.
- The easiest way to do this is to use a string to tie around both posts
- Use the leveler to make sure the string is level
- Mark where you need to cut with a pencil.
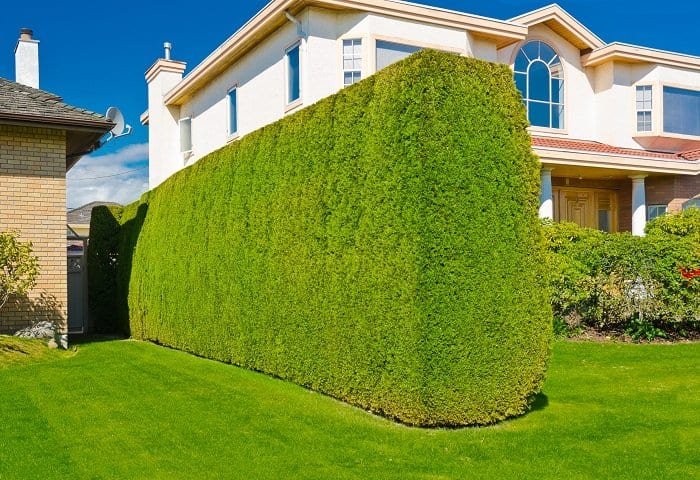
- Now you can install your fence. There may be gaps near the bottom of the fence. This is easily fixed. Fill that gap with gravel or dirt. Another option is to plant some bushes or plants to mask the uneven ground. Either process will make your fence looking nice in no time.
Stepped Fence

If you have a steep slope, this style is the best option. It is easy and doesn’t take any extra work than just making the fence look almost like a staircase.
As an Amazon Associate I earn from qualifying purchases.
You have to make sure that each step has its posts level with each other. You can always cut down one post or the other to make them even.
- Again, you will take the string and tie it to each post. Ensure the string is level, and then mark the post at that height you need to cut.
- You can then cut any remaining post off so that each post is level with the other.
- Remember, it is easier to take off height than give height back, so just make sure you don’t cut too much off if you are not used to using a saw or unsure about your measurements.
Remember, you will have to make adjustments depending on the soil composition and terrain.
Racking Fence

The style of a racking fence is easy to install posts, but maybe a little more difficult for the fence as a whole. Again, this style is best for a slope, especially steep ones. Luckily, you do not have to level the posts out like the stepped style. Your fence will run diagonally with the slope like a slide rather than a staircase.
This is how you will install these fence posts:
- You will stagger the posts down the slope, so measure out how far apart they need to be a part, which is usually between 6 to 8 feet.
- Dig the hole for your post, about one-third of the post or 2 feet deep.
- Pour in your gravel, about 6 inches, at the bottom of the hole.
- Insert your post.
- Pour the concrete.
- Make sure your posts are standing straight. You can use a leveler to make sure that your post is straight and not leaning to one side or the other. (Here we go over how you can fix a leaning fence)
- Set the leveler vertically to see if the post is straight up.
- Make sure it remains this way while the concrete is setting. If this sets wrong, it can mess up your fence, and you will have to put in a new post.
- If you are putting in an intermediate post and aren’t using concrete, make sure you pack the dirt in. Don’t use topsoil. You may need to mix in gravel depending on the dirt composition.
- You can then work on your fence.
What Can Make the Ground Uneven?
There are many obstacles you can face. Here are a few things that could impede your progress:
- Soil composite
- Roots
- Rocks
- The ground is too uneven
These can cause you to waste extra hours of your time, but there are ways to overcome them. Here are ways to help with these obstacles.
Soil Composite
Your soil composition can affect how you install your post. Sand is too loose and will need to put more gravel in the hole or mix it with the sand. Mixing gravel with the sand is only needed for the intermediate posts and not the corner or gate posts.
Red dirt can be dense, which doesn’t allow drainage. If the water doesn’t drain well in the dirt, it can cause your posts to rot quickly. To avoid this, mix in gravel with the red dirt. This will allow the water to drain better and provide less erosion on the surrounding ground.
Roots
Roots are an easier obstacle to overcome. You can cut through them with your shovel, or you can use tree trimmers. They need to be cleared, especially if the roots are larger. You don’t want those roots growing around the posts and damaging the posts later on.
Sometimes these roots can move your posts and make your posts weak. This isn’t great for longevity, and no one likes a fence that falls apart. For the best results, remove these roots.
Rocks
Depending on the size of the rocks, it can cause you problems. For larger rocks, you may need a tractor, but for the smaller ones, just remove it from the area you want to dig at. You may have to dig around the rock first before pulling it out.
If the rocks are larger and you don’t have the necessary equipment to remove them, adjust the layout of your fence to see if that works. Sometimes you can install fence posts a little closer together, so the fence runs over the rock. Plan each alteration before jumping into digging.
Error: No connected account.
Please go to the Instagram Feed settings page to connect an account.