
How to Replace Deck Nails with Screws

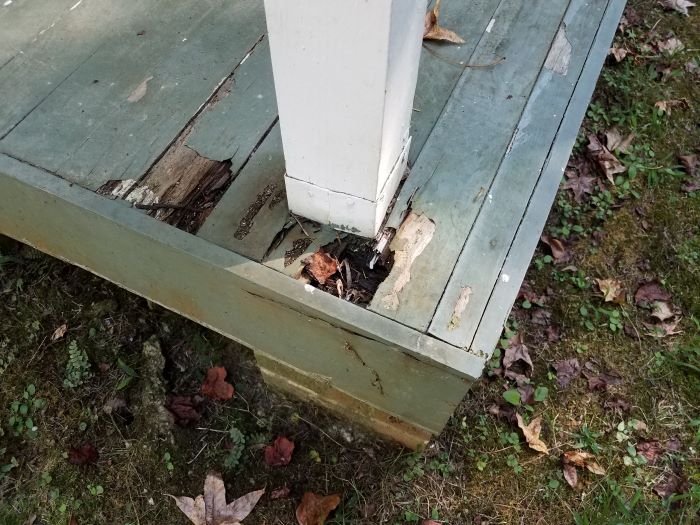
If you decking is getting older, you may notice a few board ends sticking up or nail heads sitting higher than the rest of the deck. Both items can be dangerous to bare feet and will need to be fixed ASAP. The best way to fix this is replacing deck nails with screws.
Nails were very common years ago to secure decking boards to joists, but nowadays, most people use screws. There’s several good reasons to use screws instead of nails and we’ll discus the pros and cons of screws over nails.
Table of Contents
Why Use Screws?
You may wonder why should I use screws instead of nails for my deck boards? Screws have more holding power, keeping your deck boards secure to the framing. Even if you use ring shank nails, over time, the deck boards slowly start to loosen.
Water penetration around the nail holes, causes the wood fibers to loosen around the nails. The spiral screw threads continue to hold the deck board securely even with water penetration.
The biggest con to using screws over nails is the amount of time it takes to install screws. Nails driven with a nail gun is very fast compared to using a drill to install each screw. Even is you’re very skilled with a drill, it still takes twice as long to use screws.
Replacing Deck Nails with Screws
Now that you know why you should have screws instead of nails holding your deck boards, let’s discuss how you can switch them out.
As an Amazon Associate I earn from qualifying purchases.
If your deck is older then I would take a guess that your nails are already losing their grip and will be easier to replace. If the nail heads are popping up, you can easily use a pry bar to remove the nail. After inspecting the nail, note the diameter of the shank.
You’ll want to make sure you use a screw diameter that is slightly bigger than the nail. Using the same hole, install the screw. You’ll repeat this process for any nails that are already slightly elevated and easy to pry off without damaging the deck board.
For nails that are more secure, you will need to pry the entire deck board away from the joists to remove the nails. That may sound intimidating, but it’s really not difficult and will ensure that you don’t damage the top of your decking board.
Tools
You will need a good claw hammer and pry bar to remove the deck nails from the boards and a drill with proper bit to install the new screws. Make sure to use star bit screws to lessen the chance of stripping the screw head.
Let’s talk about the proper pry bar to use so you don’t damage your deck board. You need a pry bar with flat sharp heads for easier insertion between deck board and joist. This makes it easier to not damage your deck boards.
One end should have a rocker head curve to give you enough torque to lift the deck board away from the deck joist. Lastly, each side of the pry bar should have a V slot to easily remove nail heads. The curve side is the easiest to get under the nail and completely remove the nail.
As Needed Deck Nail Replacement
If you’re only replacing nail heads that have popped up and not the whole deck, you don’t have to take the board completely off. You just need to pry the deck board up a couple of inches. With the board up a couple of inches, tap it down with a mallet, it will cause the nails to stay up. With the nail head slightly elevated, you can easily remove it and replace with a screw.
Please don’t use a pry bar under a nail head that is tight to the deck board. You will damage the deck board and cause more harm. The easiest way to pry up a deck board is at the end or in between decking.
If you have access to the end of your decking board, tap the pry bar with a hammer in between the board and the joist. Once you have enough leverage with the pry bar, you should be able to lift the deck board up.
If you use a pry bar in between decking, make sure to use a spare piece of wood underneath the pry bar. Some soft pressure treated pine decking will bend and dent under the force of a pry bar.
Whole Deck Nail Replacement
If you want to remove all nails in your deck, the easiest way is to remove the decking entirely from the joists. Using the same techniques above, you want to make sure not to damage the decking boards when removing the nails.
This would also be the best time if you need to replace deck boards since you’re removing them anyways.
Once the decking is lifted off the joists, most all the nails should still be attached to the decking board. Place the decking board upside down on a pair of sawhorses. Hammer the protruding bottom part of the nail till there’s enough room to get the pry bar under the head.
You will need to do that for all the nails in each decking board which could total thousands of nails. This will be a long and tedious project if you plan on doing an entire deck. Many people will just wait and replace nails with screws as needed until it is time to replace the deck boards.
Conclusion
Replacing deck nails with screws is not a hard project especially if you’re just replacing as needed. If you’re tackling the entire deck, be sure to take your time and try not to damage your decking board as you’re removing the nails.
Once you have that deck project completed, you might want to learn how to stain your deck or other methods to extend the life of your deck.


Jena, Thanks so much for this information. I have a 27 year old screened porch with wood deck (not pressure treated) and I have several nails popping up. There never seems to be a handyman available so your post has given me the confidence to fix this issue myself. I’m thinking I would need to pull one of the old nails out and take it to my local hardware store to get the proper size screw? Also, I do have some paint peeling where moisture reaches the deck and would like to repaint the whole deck. Wondering if you have any advice on the treatment of those peeling areas before painting? The wood seems to be in fairly good shape, just surface paint peeling. Thanks again for your post!
Hi Dawn, thanks for the comment. Yes, pull a nail and then get a screw that is slightly bigger in width to make good contact with the surrounding deck wood. As far as painting your porch wood, I’m not a big fan of painting exterior wood, even a porch. The paint layer sits on top of wood rather than soaking in like a stain, which is why paint peels when moisture gets under the paint. Paint can hide wood rot so be careful if you do decide to repaint your porch. Here’s several paintable water repellent preservatives recommended by Family Handyman https://www.familyhandyman.com/article/prevent-peeling-paint-with-water-repellent-preservative/
Hi Jena, interesting blog post, thanks.
I am dealing not with normal nails but with ring shank nails used to attach decking boards to joists. When I pulled up some boards that were getting punky, they came up around the ring shank nails, instead of the nails coming up with the board!
So, my first question: how do I get the ring shank nails out of the joists, ideally without damaging them?
Second question: how do I get the not-punky boards up?
Aaargh! Whatever amount of time someone saved with these nails the first time around, it’s taking way more than that for demo!
Hi Kelly, thanks for the comment. I have demo’d several decks with ring shank nails and you’re right, it’s a lot harder than regular nails. The easiest method to remove the nails is to pry underneath the deck board in between it and the joist. Use a scrap of wood under the prybar so you don’t damage the deck boards. Once the board is up an inch or so, tap slightly down on the board and the nail head should stay exposed enough to get underneath to remove it. A second option is you may have to remove the entire board from the joist. Turn the board upside down and hammer the nails flush to bottom of deck board. Pry the nails off on the top side while being careful not to damage the deck board. I hope on of these methods work for you!