How to Attach A Ledger Board to A House for A Patio Cover
Patio spaces are great for relaxing and spending time outdoors. However, the same cannot be said if your patio lacks a cover, as you’ll not be protected from the elements. A great way to improve your patio is by attaching a ledger board for a patio cover. Not only does it offer shelter from sunlight and rain, but it also adds aesthetic appeal and value to your home. It’s not a complicated process either to attach a ledger board to your house.
You will need to know what is required when attaching the ledger board to your house and how the entire process works, which you will learn if you read on.
Table of Contents
Considerations Before You Get Started
If you’re not sure where or how to install your ledger board to your house, you may need to ask a professional to take a look inside your attic. Different housing structions, such as wood framing or concrete block/brick as well as different roof framing, (truss vs roof rafters) all make a difference in how you attach your ledger board.
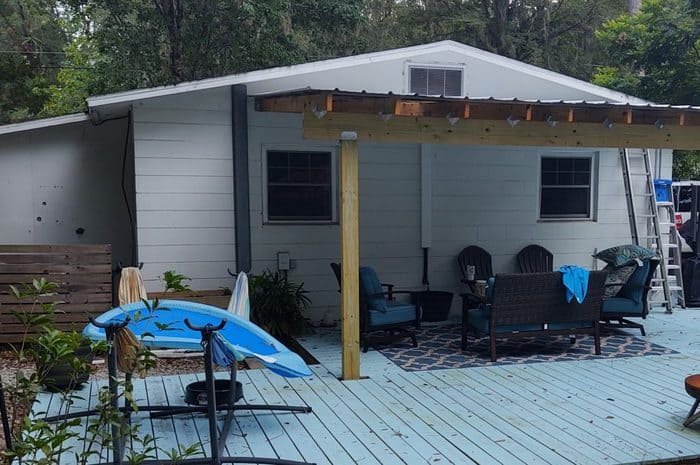
In our case, we have a concrete block home with roof trusses. Our patio cover is installed at the end of our gable roof. I installed the ledger board on top of the concrete block wall where the truss bottom chord and top plate meet as well as through the ½ plywood sheathing. I could also have gone through the concrete block but that would have required different hardware.
With moderate carpentry skills and someone to help you out, you can have a patio cover built within a day or two and a ledger board up within a few hours. However, there’s a few things that you must consider before you get down to work:
- The height of the patio cover – Where you set your ledger board determines the top height of your patio cover. If you live in an area that snows, you will need a significant slope/roof pitch and your ledger board will need to be installed very high. We live in Florida, so our pitch is minimum with a metal patio roof.
- Over or under – It’s often a debated topic on whether the patio roof should go over the house roof or under it if trying to install ledger board on the hanging end of a roof. Again, depending on the height of your roof, you can choose any of the two.
- What about a permit? – Many DIYs have struggled with this but in most cases, a permit will be required since you are attaching the ledger board to your house framing.
Let’s Talk About Tools and Resources
Tools and resources are critical to the success of your patio cover project. You also need someone to lend you a hand. Observing proper safety measures is also a requirement. So, what do you need to complete your patio cover project?
As an Amazon Associate I earn from qualifying purchases.
Tools/Materials:
- 2×6 Pressure treated lumber for ledger board
- LedgerLok structural screws
- Drill/Impact Driver
- Level
- Circular saw
- A frame Ladder
How to Put Everything Together
You need to start by taking proper measurements to determine how big you wish the patio cover to appear. Create a design or a model and compare it with the house to determine if the measurements fit and won’t interfere with the view from across the room. Leave room for natural lighting, especially if there is a perimeter wall or another structure near the house.
Prepare the Wall and the Ledger
Once you have decided how long your patio cover will span, you can purchase the correct length ledger board. In our case, our patio is 16 feet long and 12 feet deep. Our ledger board is 2x6x16 pressure treated pine.
If you have beveled siding you can install a piece of inverted siding to give you a flat surface to attach the ledger board. Make sure to account for the extra thickness of the extra siding and use longer screws.
Attach the Ledger

You will need two people on ladders to attach the ledger board to your house. Please see the attached pdf from fastenmaster, the maker of the ledgerLOK screw, to determine the required screw pattern for your ledger board.
You will use a W pattern on the ledger board for your screws and it’s easier mark the screw locations and prescrew one ledgerLOK on each end while it’s on the ground. LedgerLOK company has great installation instruction documentations at this link. https://www.fastenmaster.com/documentation/installation-instructions.html
Once you have everything marked and a ledgerLOK screw predrilled flush through your ledger board on each end, pick the board up at set it on top of the two ladders along with a level.
With your drill or impact driver hooked on your pants pocket, or tool belt, climb the ladder to the best position to be able to screw the ledger board into the house framing.
Hold your board up in the area marked on your house for the bottom of the ledger board. Now lay the level on the ledger board.
Once you have the board leveled, go ahead the finish screwing the board into the house framing. The great thing about the ledgerLOK screws is that you don’t have to predrill anything. The screw should go straight into the framing using an impact driver.
If only one person has a drill then you will need to switch places, to screw in the opposite end of the ledger board. Once both ends are screwed in tight, you can now fill in the remaining screws into the house framing.
NOTE: you will need to mark your joist hangers at the same time as marking your screw pattern location so that you don’t have a screw located in the same spot as a joist hanger. If a screw does land in the same location, shorten the distance between the two screws. It may require a couple extra screws.
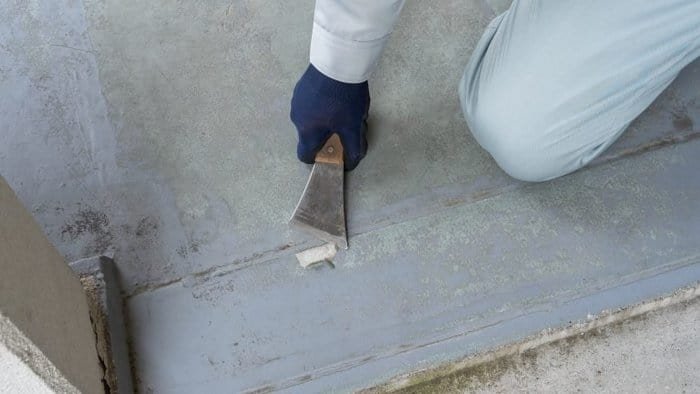
In case there are any spaces left between the ledger and the wall, use a waterproof membrane that ensures water doesn’t get in to cause any damage to the house siding/framing underneath.
You’re now ready to start the second part of your patio cover which is installing your posts and beam on the opposite side of your ledger board that will support your joists. After that you’re ready to install your joist hangers and joists, and finally your patio covering.
If you are attaching your ledger board to masonry walls, you will follow the same instruction but use sleeve anchors instead of the ledgerLOK screws. You will need to predrill into the concrete wall with a concrete bit and hammer drill before installing the sleeve anchors.
Can A Patio Cover Cause Damage To The House?
Normally, a patio cover is meant to add an aesthetic appeal to your home and also provide more outdoor space. However, if the person handling the patio cover project isn’t careful, they might end up misaligning the sloping roof, thus giving your house a bad look.
If the project requires part of the roof to be removed to expose the wall line, it’s best at this time to let the professionals handle it. There is also the issue of water drainage since such a project would require removing the gutter. This is why you will most likely need a permit to build a patio cover.
How Much Does Building A Patio Cover Cost?
On average, a simple patio cover will set you back $1000 minimum. However, the costs can escalate to $5000 if the project gets complicated, such as removing parts of the roof to attach a ledger. If you want more style and customized designs, you should also be prepared to dig deeper into your pockets. With that being said, you can significantly cut down the total cost if you handle the project by yourself.
Is A Patio Cover Worth It?
A patio cover is an essential part of any home. Not only does it improve the appearance of the house, but it also allows you to turn a neglected outdoor space into something useful. Installing a ledger board might sound complicated, but having a dry outside area can prove critical.
Conclusion
It’s a waste to have a patio and not use it simply because there is no patio cover. Attaching a ledger board to a home is the easiest way to start the process of building a patio cover. With moderate carpentry skills and proper motivation, you can have a patio cover ready within a day or two, providing your future summer bash guests with some well-needed shade out of the sun. While you could hire a contractor (and should in some uniquely challenging situations), it costs a lot less if you do the work yourself.
Be sure to checkout our article were we teach you how you can attach a security camera to your vinyl sliding.