
How to Stain a Deck with a Roller
Are you looking for the best way to stain your deck? And maybe with a roller? I went through the whole process recently and will share with you all the steps we took to stain our deck with a roller.
After building my deck, I knew I wanted to stain it a really fun, vibrant color but wasn’t sure exactly how. It took me a year to decide on a color and to find a product that will hopefully last more than one season.

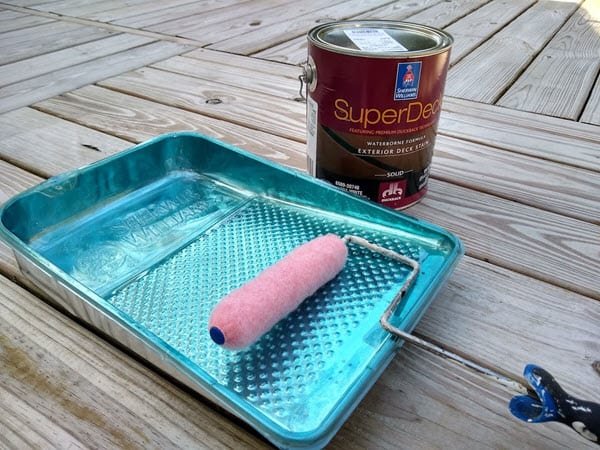
After doing some thorough research on different stains, I decided on superdeck by sherwin williams. I chose a solid color stain since it’s protection should last longer than a semi solid or semi transparent stain.
I knew once I choose solid color stain, that regardless of the color I would have to continue with a solid stain because you can’t use a semi solid or semi transparent over a solid stain.
I used cheap pressure treated pine deck boards due to my budget so I figured a solid stain would make it look better than a semi transparent or semi solid stain. I also chose the solid stain due to the color.

I wanted a beachy feel for my deck and choose SW6772 Cay.
Honestly, the color on the screen seems off from the actual color on our deck.
As an Amazon Associate I earn from qualifying purchases.
Per the guy at Sherwin Williams, you can pick any color for their solid stain by Superdeck.
Average Cost to Stain a Deck
For the diy’ers, it will cost between $20-250 to get all the materials and if you are renting a power washer for the weekend.
I got two gallons along with some ½ nap rollers which should be able to cover any rough areas of the deck rather than a smaller nap roller.
I had pressure washed the deck the week before and you can see how that went. I made sure to blow and sweep any debris off the deck as well as remove anything on the deck such as plants and patio furniture.
The easiest tool to use to remove debris in between deck boards is a 5 in 1 painters tool that has a flat blade on one side and a hook point on the other.

After building several decks, including a grill deck, I made sure to use a ¼ gap in between the current deck boards.
In climates with higher humidity, if the gap is too small, debris can get stuck and keep the boards wet and cause the decking boards to degrade faster. These are tips to extend the life of your deck.
How is Solid Stain Different than Paint
When I shook the can and poured it into my pan it pretty much looked just like paint, not stain.
At that point, I still didn’t really know the difference between paint and solid stain, but I did some research. Solid stain has less pigment than paint and it allows more of the wood look to come through.
Also, instead of soaking into the wood, the solid stain creates a film on the wood (similar to paint) The main difference between solid stain and paint is just that solid stain doesn’t have AS MUCH pigment as paint does. I guess it’s more like diet paint.
Rolling the Stain on the Deck
As with any paint project, I began rolling along the length of the deck boards, not across them. We were going to have an awesome video of this whole process, but the camera stopped working in the middle.
Still, we set it so some cool music and thought we’d share anyway.
It’s easier to work in smaller 4×4 squares and didn’t take long before I had the entire deck rolled out.
It’s definitely easier to do this when it is not super hot since the stain starts to dry quickly and you want to keep a wet edge for your roller. You also don’t want to put too much pressure on your roller or you will get streaks that you have to roll out.
I would roll several deck boards to get even coverage then roll one last time ever so lightly before moving to the next section.
The next day, I took a thick paint brush to go in between the deck boards where the nap roller couldn’t get and to cover any knots that needed extra coverage.
This part took much longer and you’re pretty much on your hands and knees the entire time. It was not enjoyable but made a huge difference with how the deck looked afterwards.
Since the camera died on us, this is a week later and we’ve added back some of the furniture and our favorite pellet grill. I also rinsed it down, since it was high pollen season, so you see that it’s a bit wet.
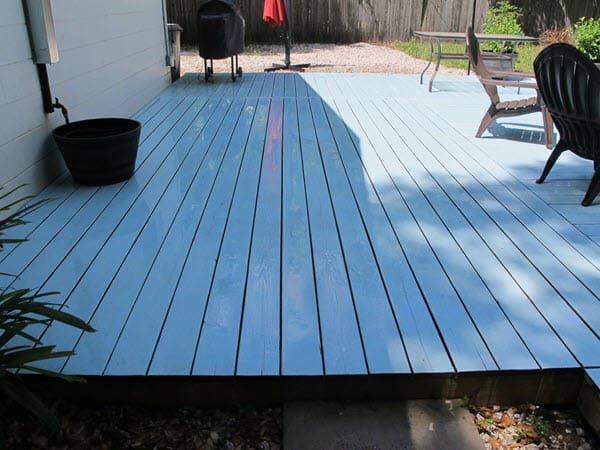
Obviously my deck color shows every single piece of debris that a regular brown stained deck would not but the color makes me happy.
I’m not sure how the solid stain color will weather over the next few years but I am hoping to take pictures every six months to show the progression.
UPDATE: It’s been 4 years since I first stained the deck and it is showing its age now. I’ve power washed it 5-6 times and the last two had some of the stain flaking off. Over all the stain has held up well in our brutal Florida weather. I’ll re-stain it this year in the Fall the same color and see how that project goes.


Are you sure you didn’t use paint on this project? I clicked on the color you choose, Cay, and found that sherwin williams does not make a deck stain in this color? Did they mix it special for you?
Hi Louize, thanks for the question. Yes, this is definitely a stain and yes, they mixed the color. You can choose a lot of different colors with the solid stain base at Sherwin Williams. Good luck with your staining project! Sherwin Solid Stain in the link shows different bases for different color choices, not just the ones they showcase.