
How To Hang String Lights in Backyard Without Trees
Are you looking for how to hang string lights in the backyard without trees? We’ve done a few projects at our house and friend’s house hanging lights with no trees around.
Outdoor string lights bring a great feel and hominess to your backyard space. We’ll show you 8 different methods so you can pick the one that works best for you.
Table of Contents
1. Hanging Lights on 4X4 Posts
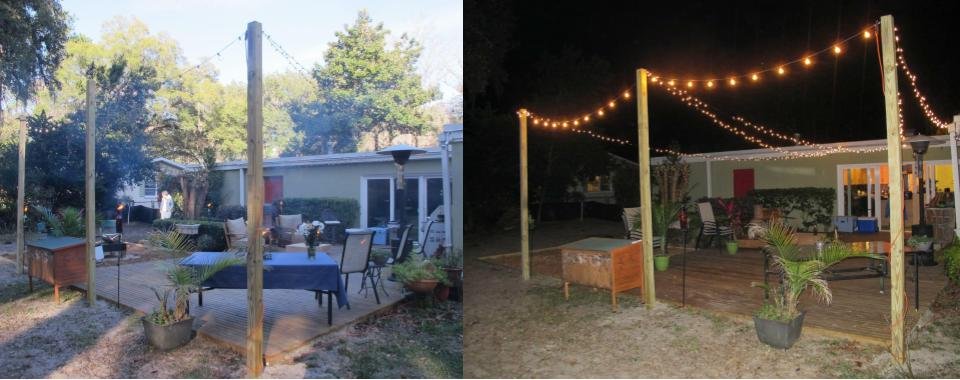
The first way you can hang string lights is by adding 4×4 posts around the area you want the lights to go. In this case, we helped our friends with a low deck adjacent to sliding glass doors.
We knew we could use the house to hang part of the lights but there were no trees for the far side of the deck.
We just needed three posts at the end of the deck to extend the lights over the entire decking area. 4x4s allow you to hang heavier commercial grade outdoor lights that will last a long time.
Tools and Supplies Needed
- 16 foot pressure treated 4×4. We got ours from Lowes
- Stainless steel hooks to secure the lights to the posts
- The lights you want to hang – we use these
- post hole level
- gravel for bottom of post holes for drainage
- ladder for hanging the lights
- Post hole digger or shovel

Figure out if you’re using your house for part of this or if you need to string the lights using only the posts as shown above. If the house isn’t involved, then you’ll need 3, 4, or more posts around the area that you plan to string lights.
As an Amazon Associate I earn from qualifying purchases.
You’ll want to figure out where you want the posts to go in your outdoor space so it will look right and mostly line up around the area where you’re hanging the lights.
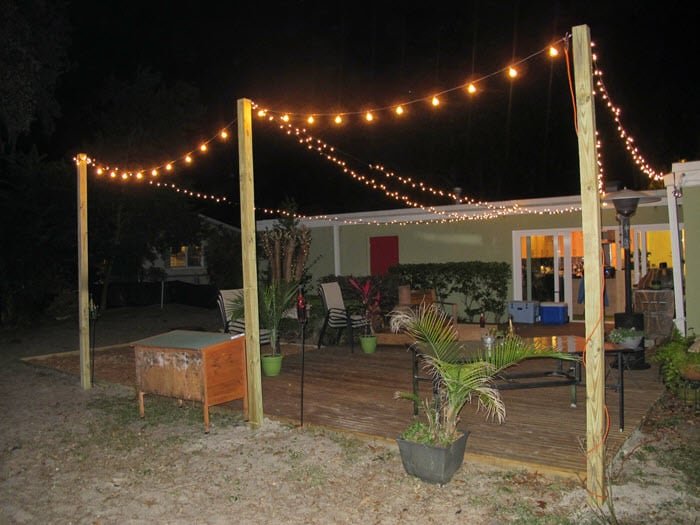
We used the house, but we were also covering a large 25-30 ft area, so we used (3) 4×4 posts.
With the post hole diggers start digging the hole for the first post. Since you’ll need about 3-4 feet to go in the ground, we purchased 16 foot pressure treated posts. This gave us 12-13 feet height for the lights to hang higher and slope down towards the house.

To make the posts last longer, add 6 inches of gravel at the bottom of the post hole to keep the post from standing in water and rotting faster.
Use the post level to verify your posts are level before replacing the dirt. When replacing the dirt around the post, make sure to pack it down good every foot to keep your post secure in the ground.

Now do the same with the other holes spacing them evenly apart. Give it a good distance from the first one and make sure it makes like a square or rectangle area for the lights.
Once the posts are in, you can use your ladder to go to the top of the post to screw in the stainless steel hooks. Ideally 2-3 inches down from the top of the post is a good spot for your hooks.
Now you can start running your lights.
Actually, you want to test your lights first. We assumed they all worked but found out after turning them on, that one part was burnt out.

Next, you want to plan how to run the lights so you can have an electrical outlet where you need it. If you don’t have a power source nearby, you can run an outdoor safe extension cord.
If you’re using your house exterior walls to hold part of the stringed lights, then you’ll want to get light clips or Stainless steel hooks to hold them in place. You usually see them around the holidays. We’ve also written about outdoor Christmas lights ideas if it’s that time of year for you.
If you don’t want to poke holes into your house fascia then we show ways to hang string lights without nails, or hooks in another article.
When you’re stringing the lights, wrap the wire around the hooks a couple of times for a little added strength. You can also choose to use cable ties to secure them. Some people will even use zip ties as well. Just know that zip ties will degrade over time from the sun exposure and start to break.
If you have outdoor rated lights, they sometimes also have little holes in the line to make this easier.
If you aren’t attaching them to the house, then you’ll want to figure out the size and shape you want for the lighted area. Then, you can put the 4x4s in the best spot.
2. Using Metal Pole and PVC
The next method is similar but uses metal poles which are thinner and doesn’t visually stick out as much as large 4×4 posts. Along with the written instructions, we put together a quick video as well.
Tools and Supplies Needed
- 10.5 foot vinyl coated pole. 1 3/8 inch diameter. We used this pole from Lowes
- These endcaps
- 1 10 foot PVC pipe 2 inch diameter
- S hooks to secure the lights to the posts
- The lights you want to hang
- ladder for hanging the lights
- Mini sledge hammer to pound the PVC into the ground
Start by cutting the PVC down to 2 foot lengths and angled on one side. You can see I’m using a hack saw in the gif below, but you can also use a miter saw which is much easier and faster.

The angle makes it easier when pounding it into the ground. After hitting it into the ground a few times, you’ll need to pull it out to remove some of the dirt.
You can easily do this by holding your hand over the PVC top to create a suction. The dirt will stay in the pipe while you pull it out and remove the dirt from the pipe.

Do this a couple of times to get the pipe at least 18-22 inches deep.
Now you can put the pole into the PVC pipe and it’s ready for the next step.

Note: Putting PVC pipe into the ground works great whether you have a deck or not. We have a ground level deck, so we pounded the PVC below the deck level to “hide” it. But, if you have a taller deck, you can add C clamps to hold the PVC pipe against your deck and then attach the pole that way.
We chose to put up three poles for the size of our deck area that we wanted to cover. The average length between all poles is about 13-15 feet.
Once we had all the poles in, it was time to string the lights.
Again, check that the lights work before hanging them. And make sure that you start with the right end that will get plugged into your outlet or you’ll have to redo it.

Ask me how I know 🙂
We laid out the string lights around the deck before hanging them to make sure we had enough lights for the project. We started on the pole nearest the electric outlet and worked our way to each pole and then finished along the back wall of the house.

We used a ladder to put the end cap on the pole and added stainless steel hooks in the hole. The lights were then hung on the S hook.

You can play with the slack in the lights and adjust to your desired height.
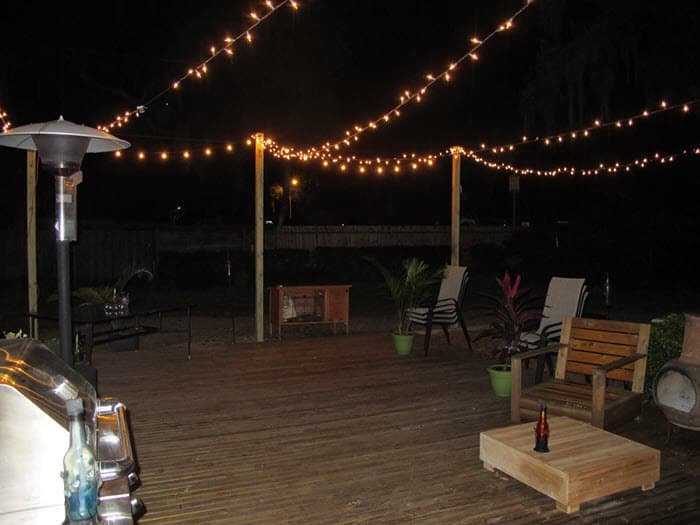
Once you run the lights to all the poles that you have, we finished it at the house and did pretty good with the lengths. We’ll probably add one more string of lights to go along the house exterior.


We like how this outlines the deck and will make for beautiful lighting during our evening visits out there.
Other Ideas For Hanging Your Lights Without a Tree
There are so many ways to get the lights up and we only showed two little ways we’ve done it. Here, I’ll share some other ways you could get your lights up by this evening.
3. Outdoor String Light Poles

Since we created our string light poles a few years ago, they’ve come out with some great ones you can buy.
Many of these light pole kits come with poles and hooks, so you don’t have to worry about getting them from different locations.
This is a good kit of four poles with light hooks and spikes that let you put the poles firmly in the ground. These posts work better with lighter weight string lights and not heavy commercial grade lights.
You don’t want to go wider than 8-10 feet with these poles since they’re only installed in the ground 6 inches or so, so make sure you get enough for the area that you want to cover.
4. Along the Fence Lighting

String lights along your fence. This adds so much depth and intimacy to your backyard. It’s also perfect way to showcase your backyard. Just ensure you have the power source for the outdoor string lights along the fence.
5. Deck Lighting
This was our last house and we loved the lighting around the deck. It was several levels so we used some rope lighting and attached it with stainless steel mounting hooks. We were able to string lights in one afternoon. The pic is grainy because phone cameras weren’t as good in 2007.
The rope lighting also wasn’t led like it is now. If I was to do it again, I’d use this waterproof led rope lighting.

6. Gazebo or Pergola or Covered Patio String Lights

If you have a pergola or gazebo, you can string the lights around or inside the structures. Since we’ve recently built a covered patio, we’ll showcase how we hung our string lights in a new video soon on our YouTube channel.
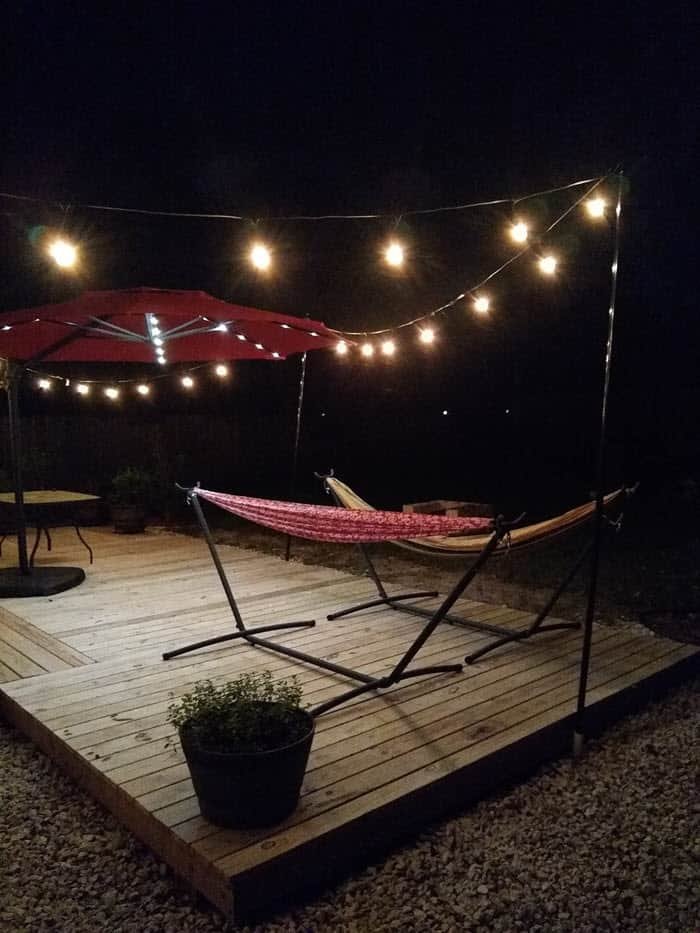
7. String Lights on Umbrella

If you don’t have a gazebo, but you have an umbrella, you can add string lights to it. Then you can keep the umbrella open at night to showcase the lighting.
8. Use Planters to String Backyard Lights
We really debated on using our planters on the deck to string lights. We decided against it because we wanted the lights much higher.
We also didn’t want to put that much weight on the planters we had since they were pretty short. If you decide to use planters, ensure they are 3-4 feet tall. That way you can put at least 12 inches of concrete in the bottom of the planters and then add soil and plants on top of it.
We hope this article helped you with how to string lights in your backyard. If you’re looking for lighting ideas, take a look at our rope lighting ideas for your backyard.
If you liked this article, then please subscribe to our YouTube Channel for Backyard video tutorials. You can also find us on Facebook.


How were the chain link fence end caps used on the 4×4?
Thanks for catching that. The end caps were meant for the second way of hanging lights, and not used with the 4X4s.
Could you please tell me the diameter of the PVC pipe that you used? Thank you!
Hey Terri,
We used 2 inch PVC and the fence railing is 1 3/8 inches, so it worked perfectly for us.
Thank you for the quick response, I appreciate it. 🙂
Sure thing! Would love to see how the project goes for you if you end up doing it 🙂 Take care.
Is there a reason you don’t just shove the metal pipe into the ground? Whaat is the reason for the pvc pipe holding it in place?
Hi Carrie,
You can try shoving the metal pipe into the ground without. For most areas, it will be difficult to shove a metal pipe 1.5-2 feet into the ground. You want the poles to go deep enough that they are sturdy enough for the weight of the pole and lights. Let us know how your project turns out if you end up doing this!
Christina
How do you string the lights thru the cap on the end of the pole? Looks like the cap is a circle and a light wouldn’t fit thru one if that makes sense
There’s a cap at the end of the pole with a hole in it. We use S hooks to go through the hole and the other end of the S hook holds the string of lights. Hope that makes sense.
Thanks for the great post! Did you have to glue or otherwise secure the end cap onto the pole? Wondering how snug/secure the fit to the pole is.
Hi, thanks for the comment. No, we didn’t glue them since the fit was fairly tight. They have been up for a couple years now and they haven’t come off yet and we’ve had some pretty good winds from nearby tropical storms.
Hi! I’m currently working on this project using the metal fence rails. I have found that the 1 3/4 PVC is a snugger fit for the rails than the 2″. But before I cut and set into the ground, are there any drawbacks here? Do you need some space for the poles to move in inclement weather? Would the smaller diameter PVC snap?
Thanks in advance!
I think the smaller pvc is fine to use. As long as the pole fits inside the pvc, then it will work.
Hi! Does the post have to be vinyl coated? There’s an option at Lowe’s that’s available in store near me that is galvanized. Would that work? Thank you! Excited to hang lights to spruce up my sad-looking yard
Hey Juliana, yes, the galvanized would work as well. Good Luck with the project!
Thank you so much! Very thankful that you have the video with the step by step. My husband and I are not handy at all – love how you broke it down so well!!
Ah Thanks!
Is vinyl coated for any safety reason??
It’s more for weather proofing so the metal doesn’t rust.
Hi Guys
Great tips!
How reliable is it to use a mini sledgehammer to knock the PVC pipe into the ground for your second option i.e. the poles? Is there not a big risk that it may break? or are the plastic pipes really solid?
Would an auger drill be another good method or is that unecessary?
Also, are the pipes like 18 inches underground and then 6 inches of the PVC pipe is exposed above ground?
You can use a mini sledgehammer, just be careful to not hit it on the edges as the PVC will crack. You might try a mallet instead. Thanks for the comment.
Can I just use tall Shepard’s Hooks to string the lights?
Hi, thanks for the question. I think that depends on the type of lights you use. Lighter smaller fairy lights might work but anything large will be too heavy. Also your lights won’t be very tall hanging on a Shepard’s hook.
The great thing is you can use anything you like to hang lights as long as they properly support them.