
How To Build A Ground Level Deck

Every homeowner dreams of transforming their yard into the perfect outdoor oasis, and building a deck is atop item on that list.
To many, this seems like a complicated project, and rightfully so, but a ground level deck eliminates some of the hard work since you don’t need stairs or safety railings. So how exactly can you build a ground level deck?
Below, we’ll discuss the exact process of building a ground deck, which includes the layout and design, planning the foundation, and laying the deck boards.
What’s the Process of Building a Ground Level Deck?
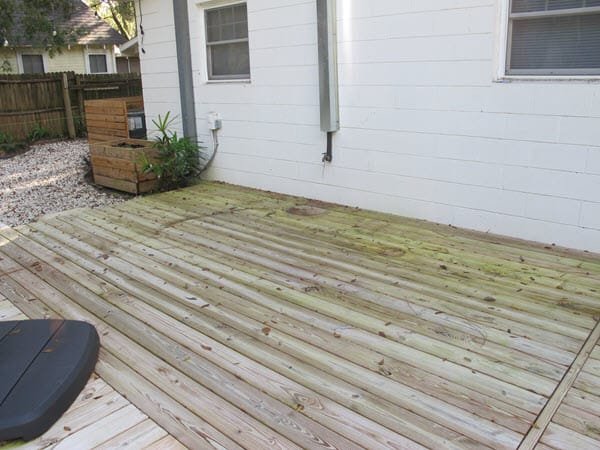
Ground level decks are one of the most straightforward outdoor structures to build but definitely not the easiest. Ground level deck advantages include not needing stairs or deck railing. A big disadvantage is needing enough ventilation underneath so the deck won’t rot prematurely.
A ground level deck is considered less than 12″ from the ground. It should be well-ventilated to allow free air movement to prevent wood rot. Always use ground rated pressure-treated wood or better for the framing and decking.
One advantage of a ground level deck is that it doesn’t need to be attached to a structure. This eliminates the need for a ledger board which can be a source for wood rot to your house foundation, if not installed properly.
Due to not needing stairs or railing also makes a ground level deck cheaper to build.
As an Amazon Associate I earn from qualifying purchases.
Most ground level DIY decks cost $10-15 per square foot for pressure treated framing and decking and 2-5 times more if you have someone build it for you. The cost can go comparatively higher depending on the materials used and the shape of the deck.
If you want to upgrade your decking, chose a composite decking for longer life and easier maintenance. The newer composite materials look way better than they did 10 years ago.
These are the DIY steps of building a ground level deck:
The Plan And Design of a Ground Deck
The success of any project depends on the planning. If you get this right, you’re halfway through your successful project. In this stage, you need to consider the following:
- Location – You don’t need a huge space for a deck, as small and simple is always better. Make sure you choose somewhere you can enjoy the view of your yard.
- Drainage – Standing water is the enemy of wood, and you should prepare the area around and under the deck for good drainage.
- The size and shape of the deck – To build a backyard deck without needing a permit, it should not exceed 200 square feet or go above 30 inches height. If you want a bigger deck, you can pull a permit or you can build separate frames as I did in my back yard.
- Direction of deck boards – Deck board orientation will determine the framing elements of your deck foundation. If you want diagonal deck boards, you’ll need extra framing materials to support them properly.
Typical wood lengths are 8, 10, 12 and 16 feet long. To optimize costs and least amount of waste for framing and decking boards, you want to use a deck size that incorporates the lengths above. An example would be a 12×16 deck.
Deck Framing Plan
The heart of your deck is it’s framing. Knowing how to properly frame your ground deck will start your project right and create a long lasting deck. The smallest framing material that is acceptable for a ground level deck is 2×6 pressure treated wood. Never use 2×4 framing to build a deck frame.
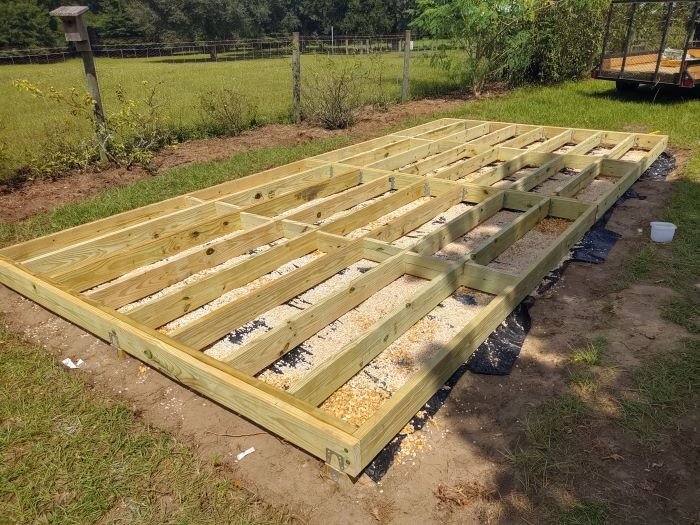
Regular deck framing has joists laid on top of a beam. A ground level deck has a flush beam, or a beam that is at the same height as the joists. This is key to getting a deck that is low to the ground. Joist hangers attach the joists to the beams giving a ground deck the proper structural support.
The beam is made up of (2) 2×6 wood or twice the thickness of one 2×6 joist. Conventional framing charts will show southern pine 2×6 joist spaced 16″ inches apart will need a beam every 9 feet for support.
In my opinion, 16 inches should be the farthest span for joists for a ground level deck. 24 inch spacing makes a deck feel bouncey with 2×6 wood.
In my deck above, which is roughly a 10×18. I have 3 beams, 2 on each end and one in the middle. Next, calculate how many joists you need, spacing them every 16 inches. 120/16=7.5.
Can’t have half a joist so round up to 8. 120/8=15. So, now you’ll space your joists evenly every 15 inches on center. Remember though you start at 0, so you actually need 9 joists as shown in pic below. Now you can calculate how many framing members and hardware you need to build your deck frame.

Gather All Materials Needed
Pressure treated wood is the primary material for framing any deck, especially a ground level deck. No matter if you live in a wet or dry environment, building codes require ground contact pressure treated wood for any framing members that touch the ground.
Make sure your beams and joists are considered “ground contact” pressure treated wood. If you don’t use that type of wood, your framing will not last long.
As far as decking, there’s a wide choice of materials as listed below. The lowest grade possible is pressure treated decking which will also be the cheapest. How long your wooden decking lasts will depend on many factors.
Many decks are made with pressure treated wood decking and last a long time with proper maintenance. If your deck will see a lot of sun rays, see which type of decking is best for full sun.
If you want to upgrade the look and prolong the life of your deck, consider tropical hardwoods, i.e., ipe, cumaru, tigerwood or composite wood decking. They cost 2-3 times more than pressure treated decking but will last 2-3 times as long. If you can’t decide which size decking, read our article about the difference between 5/4 decking and 2/6 decking boards.
- Pressure Treated Decking
- Cedar
- Redwood
- Tropical hardwood
- Composite wood
Calculating how many decking boards you need is straight forward once you know the width of your decking planks and your overall deck length.
Our deck framing is 10ft wide by 18 feet long. We’ll use 10 ft long decking boards so we need to calculate how many boards to span 18 feet. Standard 6 inch wide decking is actually 5.5 inches wide. So divide 18 feet or 216 inches by 5.5.
Remember, you’ll overhang the first and last decking board by an inch, so add 2 inches to the total. 218/5.5=39.63. You need 40 total decking boards. I usually buy extra boards just in case there are some bad boards in the mix. You can return any uncut boards to the store.
Note: This doesn’t account for the spacing in between boards, but gives you an overall number to purchase decking.
Account For Deck Ventilation
Free air movement helps keep the ground under the deck dry and fresh, which should be at the top of your priority list. If you’re looking at building a ground level deck, I’m making an assumption that maybe you’re trying to go below a patio door or you want something without a big step up.
If you’re building a deck less than 6″ inches from the ground, you’ll have to remove a lot of dirt to get the required ventilation underneath. Removing dirt will be one of the biggest parts of the entire building process.
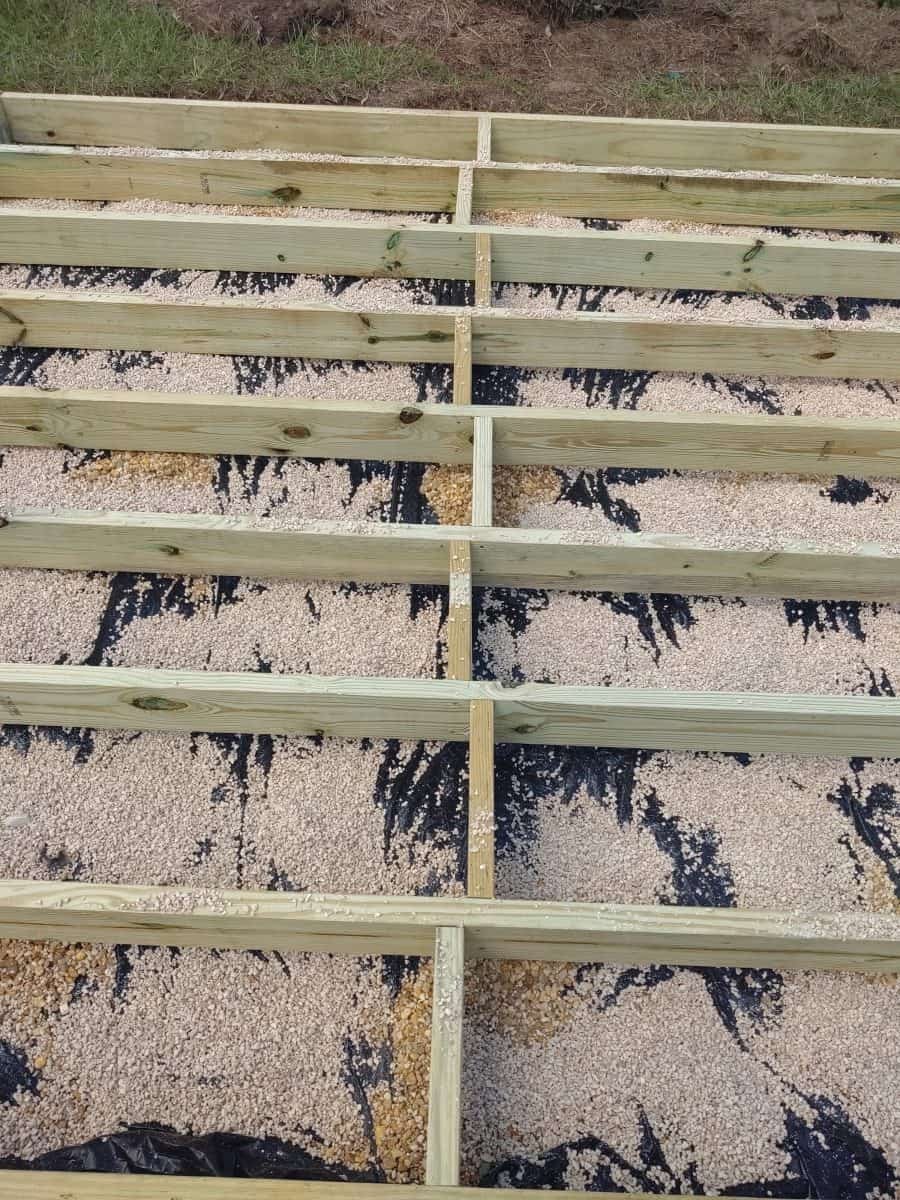
I try to dig at least 6″ or more of dirt from underneath my ground level decks, then lay 2-3 inches of gravel over weed barrier fabric, which helps with water drainage. This will also help extend the life of the deck.
Set Up Leveling And The Framing

The foundation of any structure is very critical as it determines its strength and longevity. If you’re going under a patio door, that height is key to know for your deck height. I actually go backwards when building decks by putting together my flush beams and joists first.
I build the outer layer of my framing at the height I need, then I go around each side leveling it with concrete blocks. Having a long level helps to lay on to top of the framing boards. Once everything is level you’re ready to frame everything.
Make sure you’re outer framing is a few inches less than your longest deck board. Typically you want at least an inch overhang from your deck board to your framing underneath. If you deck boards are 16 feet or 192 inches, you will want your framing to be 190 inches or less.
I usually build my framing 4-6 inches less since most decking boards have checks or cracks on their ends that will need to be cut off.
Set Up The Beams
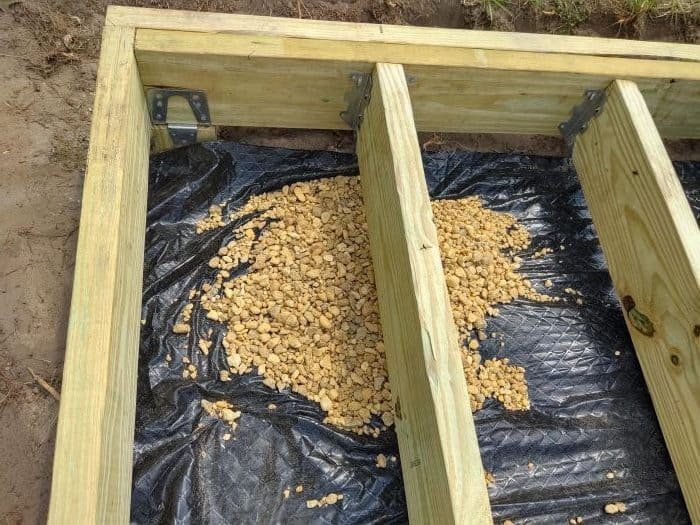
The flush beams will be necessary in order to allow better drainage and free airflow under the deck. Make sure they are supported throughout the bottom of the deck either with buried concrete forms or floating concrete blocks. Where you live may dictate which you can use.
Anywhere with high wind possibility will require you to anchor the deck framing to the ground. You would need to either bury posts in concrete or use concrete forms and use hardware to connect to the deck framing. If you’re able to use floating concrete blocks, make sure you have enough to support the framing properly.
If you need to shim a few spots, use composite shims under the beams to improve leveling. Another option would be to add more gravel to the ground to level it up.
Add Inner Joists
Before connecting all the inner joists, make sure your deck is perfectly square by taking a diagonal measurement from each corner. The measurement should be the same, if not, make adjustments, until it is the same.

I connect all my outer beams and joists with structural screws and joist hangers for my inner joists. These hardware choices will give you peace of mind to know your deck framing is very secure.
To make your deck even more sturdy, add blocking between the joists, especially if they are longer than 10-12 feet. Adding blocking halfway will stiffen the joists creating a more secure deck.
Lay The Decking
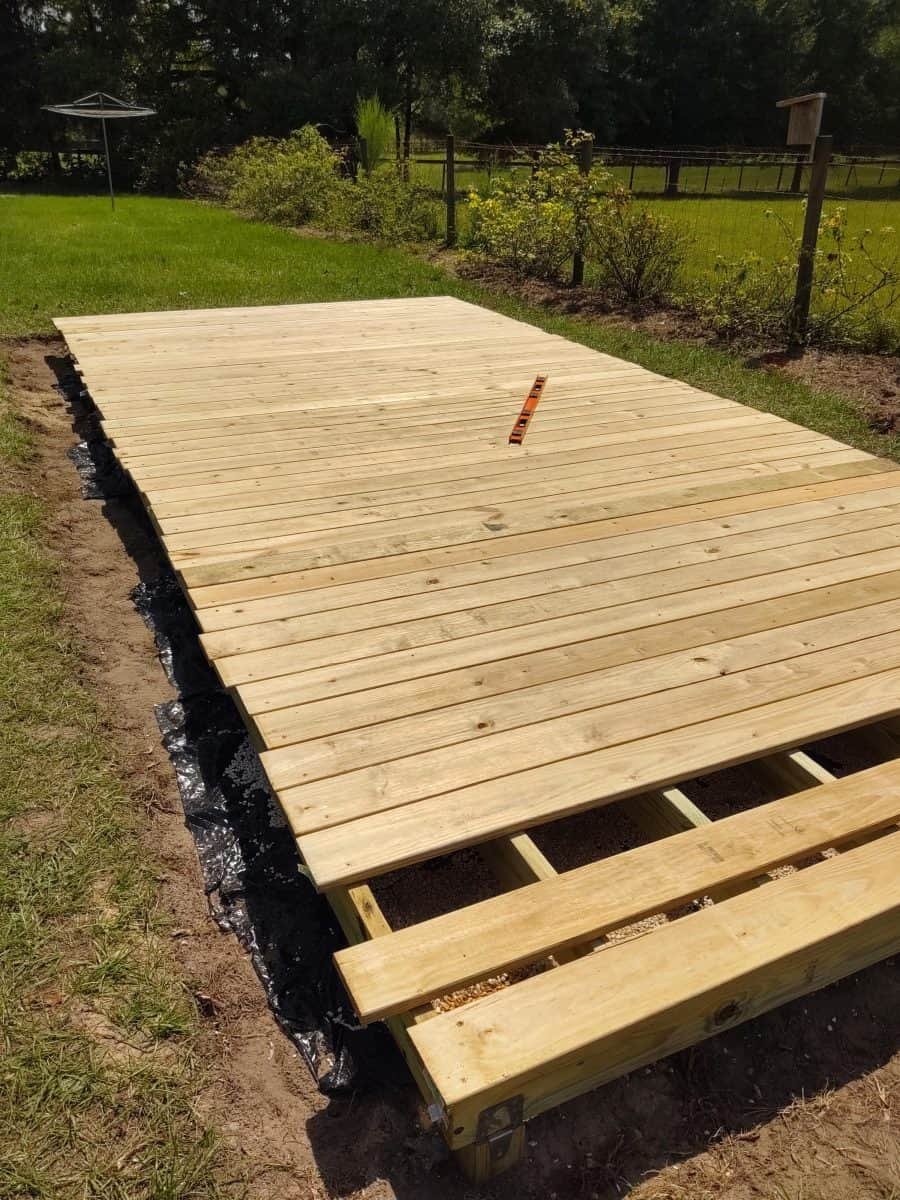
Before laying the decking, inspect each one to find any that may have cracks or checks at the end.
I like to lay all my boards on the deck and install a few screws in each, then go back and fill in with the rest of the screws. Each joist will get two screws per decking board.
I also cut the ends of the boards off after installing rather than cut each board separately before installing.
Note, if your first board will be next to a house go ahead and cut that one to the correct length.
With a ground level deck, you’ll want a bigger gap to allow more ventilation. I use 1/4 to 3/8 inch gap between my decking boards. If using pressure treated decking boards, be careful setting your boards, as they will shrink as they dry. Depending on the wetness, a 1/4 can grow to almost a 1/2.
To cut the ends of the deck boards at once, chalk a line across the board at the point of the cut or clamp a long straight board to the framing, as noted in the pic below. Take a circular saw and saw through each board at the marked line.

If you don’t feel like you can screw in a straight line, chalk the joist locations perpendicular to the decking. This will keep your decking screws in a straight line and look more professional.
Conclusion
Ground-level decks are perfect for transforming your outdoor space into something that you will spend countless hours enjoying. It’s also a simple structure to build with the right instructions.
Hopefully, we’ve given you the confidence to tackle this project for your backyard. Don’t forget to maintain your deck by pressure washing regularly and staining or painting to prolong the life of the decking boards.


If you create separate frames for a larger floating deck how do you deal with the deck boards? Those essentially tie the entire deck together. How does the 2 (or, I guess, in my case 4…18′ x 20′) frames make a difference? Thank you.
Me again…oops not 4 frames, I still can do 2….10’x18′ will equal 180sf each. But the question is still the same. The deck board tie it all together so how does that change the idea of not needing a permit (which I am not getting….shhhhhh).
Hello Shelley. In our case, I put the deck boards in different directions between the different frames. You could do diagonal decking to make a V pattern with the boards meeting in-between the two frames. Good luck with your deck project.